104 results found with an empty search
- Homestead Peak & Rob Roy / Glacier Burn Col
Date: January 11, 2025 Location: West Wanaka Mountains, West Matukituki, Mount Aspiring National Park, Otago, New Zealand Total Trip Distance: 15.17 mi / 24.41 km Total Elevation Gain: 6,400 ft / 1,951 m Trip Duration: 14 hr 45 min Team: w/ Henry Frakes Field Notes: The original trip intention was to do Rob Roy Low to High Peak Traverse in a day carrying full alpine kit. However, in the early morning the snow was not cooperating and we wound up sleeping on a rock. At sunrise we walked over to Homestead Peak and scrambled up the North West Ridge. The climb has some steeper, exposed sections with very loose rock. Rating: I, 1+ Download GPX File Google Maps Location Homestead Peak & Rob Roy / Glacier Burn Col The Southern Alps have been blessed with stable weather recently, and thankfully, it aligned with Henry’s days off. Climbing with Henry has both positive and "negative" aspects. The positives are that he is highly skilled, positive, has excellent communication skills, is level-headed, extremely fit, mentally tough, and competent. There is only one "negative" - every trip will be massive! Jokes aside...I am stoked to have a climbing partner and friend who enables me to grow in the mountains. But if I am being real, every trip does turn into a big one… Bold Peak: 11 hours Remarkables Winter Grand Traverse: 10.5 hours Mount Tyndall: 10.5 hours Mount Brewster: 15.5 hours Our original plan was to do the Low to High Peak traverse of Rob Roy over two days. As the days got closer to the start of the trip Henry pitched the idea of doing it in one day. Rob Roy High Peak and Low Peak. Our goal was to traverse from right (Low Peak) to left (High Peak). This would be something like 50 km, 2700 meters of climbing requiring a trad rack, two ice tools, rope, and a glacier kit. To be fair, doing it in a day makes it a harder day but doesn’t necessarily mean it’s a harder trip. You still have to carry all of that bivy gear and food. So we opted to do it in a day. Or rather, I was "convinced." At 10 pm on Friday night, we set off. I had been up this way before on an aborted attempt of Homestead Peak and felt confident about the route by following my previous GPX track. In the dark is a different story and we found up fucking around in scrub for a bit. Henry and I both agreed it really sucked. Eventually, we got to the tarn (no longer there) at 1200 meters and had a quick bite to eat. The terrain so far had been frustrating and the mountains were cloaked in a thick band of fog. We both started to doubt the trip and shared our concerns. It was also very, very warm. None of these things aligned with the forecast. We climbed a steep tussock spur and then sidled ugly terrain at 1,540 meters. At this point, we voiced that if the cloud had not dispersed we were aborting the climb. There were too many unknowns: - We had never climbed the route or been on the Avalanche Glacier. - We didn’t know of a single person who had ever climbed the Low to High Peak traverse. - We had low confidence in the forecast. When we hit the snow another problem came up - it was completely isothermic, a wet mess. Thinking it may just be the lower elevation, we climbed to 1850 meters with the same result. Game over. Not happening this time. We found a rock to lay on, put on a puffy, and fell asleep. At 4:30 in the morning, we got out of the stove and brewed some coffee. I waited for the caffeine to hit and convinced Henry to climb Homestead Peak. He really didn’t want to, but when I explained to him that I was never coming up here again unless it was for Rob Roy, he said yes. What a guy! We romped over to the North West Ridge and scrambled the loose, exposed terrain to the summit. Our view was obscured by the cloud and spent less than ten seconds at the high point. There was a brief moment of happiness as we glissaded down the snow. It had been one of the most mentally challenging days I can remember in a long time. The stress of a big climb on an unknown route, a very long day, climbing through the night on no sleep, carrying all of the rope and technical gear, rough terrain, and a frustratingly wrong forecast. As my buddy Alex said to me when I recapped the trip to him, “That’s the mountains for ya.” Post-trip I slept for twelve hours straight. It’s just amazing what good sleep can do and how it can make you forget all of the difficulties you experienced. Not even twenty-four hours from finishing, Henry and I were already texting each other about going back. Happy days… Henry on frustrating terrain
- Packrafting the Gillespie Pass Circuit
Date: Dec 27 - 29, 2025 Location: Makarora, Mount Aspiring National Park, Otago, New Zealand Total Trip Distance: 34 mi / 54.7 km Total Elevation Gain : 6,428 ft / 1,959 m Trip Duration: 3 days Team: Solo Field Notes: Care must be taken when crossing the Makarora River on foot. I walked up the Young and camped near the hut, although fantastic options exist if you can make it to Young Basin. The paddling starts once you get over the pass and hit Siberia Stream. Cruisy Grade I rapids turn into sustained Grade II, up to Grade III-, about 1km upstream from Sibera Hut. This can easily be portaged. Takeout 1.5km after Siberia Hut when the stream turns into a nasty gorge. Great camping to be had at Kerin Forks, and the final paddle out the Wilkin is stunning. An amazing write-up can be found here from PackraftingTrips.NZ Grade : Class II/III- The Christmas holiday period arrived in New Zealand, and I had been scheming some longer solo adventures to get off the grid. The weather hasn’t really cooperated this season for big trips. November turned out to be amazing — most of my missions happened then — but outside of that, I’ve been focused predominantly on rock and trad climbing. Gratefully, a few days of stable weather finally lined up, and I was keen to head up the Makarora. My packraft was getting dusty, and I wanted to put it to use. My original plan was to combine the trip with a climb of Mount Awful. However, warm weather and heavy rain leading up to the trip put me off that idea. I left my bike at the trailhead to the Wilkin River, drove further up the road, and started my journey up the Young. The forecast called for showers clearing followed by two fine days. Well… the showers hadn’t cleared, and I started the trip out in rain. At the first river crossing across the Makarora, a fisherman approached. “You’re not going to cross that… are you?” “I’ve got a packraft.” Then a second fisherman approached. “You’re not thinking of crossing that… are you?” “I’ve got a packraft.” Still not registering, I pulled out the packraft and inflated it. Suddenly everything made sense. I had a packraft. The rest of the first day was peaceful. I hiked alone through beautiful beech forest, across open valleys, over a couple of bridges, and eventually ended up near Young Hut. I saw no one. I camped in a lovely grassy clearing about ten minutes from the hut, next to the gurgling Young River. The night was calm and cold, and I slept well. Point 2026 from Gillespie Pass On the second day, I woke to improving weather, packed up, and began the climb toward Young Basin. Upon arriving, I immediately wished I had camped there — a truly stunning place to pitch a tent. I continued climbing to Gillespie Pass, passing trampers huffing and puffing their way upward. There was a lot of confusion seeing a guy with a paddle strapped to his pack. At the top of the pass, the views of Mount Awful opened up. What a mountain. The descent off the pass toward Siberia Stream was a bit of a grunt — steeper and more technical than expected — and I was grateful when I finally reached the crystal-clear water and began inflating my raft. This is where the fun began. Siberia Stream starts as a cruisy grade I paddle until about 1 km upstream of Siberia Hut, where a boulder garden and sustained rapids run for the entire section. I scouted it, felt comfortable, and went for it. It was the most fun part of the trip — super playful whitewater with options to pull into eddies and scout before committing. Being solo, I constantly reminded myself of the consequences of falling out and stayed laser-focused. Downstream from Siberia Hut, the stream turns into a nasty gorge, and I took out to begin the final hike to Kerin Forks. I basked in the afternoon sun, went for a swim, and enjoyed a rare moment of zero sandflies. That would not last. At Kerin Forks, the sandflies were unreal. The view was too. Not a soul in sight. I lay in my tarp tent while the sandflies swarmed the inner net, desperate for blood. I enjoyed the stillness of the night, listening to the river and the wind rustling my shelter. Camp at Kerin Forks, Wilkin River I woke at sunrise to a gorgeous morning. The sky was clear, and the sun lit up the Wilkin Valley like a message from above. The only task left was to float out the Wilkin — and indeed I did. There’s something so magical about using a packraft. A small inflatable boat that fits inside your backpack, and with some air, it completely expands your relationship with the mountains in a unique way. Instead of taking five hours to walk out, it took only two to float out. This trip was everything I hoped for: fun tramping, awesome paddling, beautiful campsites, and a peaceful way to close out a phenomenal year. We are very blessed to live in New Zealand and explore these powerful mountains. Happy days…
- Mount Barff
Date: February 13 - 14, 2015 Location: Main Divide, West Matukituki, Mount Aspiring National Park, Otago, New Zealand Total Trip Distance: 25.48 mi / 41 km Total Elevation Gain: 8,769 ft / 2,673 m Trip Duration: 2 days Team: Sam Gallup Field Notes: The South East Ridge a fantastic climb and Liverpool Hut makes a convenient base. The key to this summit is route finding and it pays to be dialed in. Do not follow the ridge from the hut. Instead, begin traversing West towards Arawhata Saddle. Cross a creek and then start climbing up a small bump. After roughly sixty meters, sidle northwest into a gully that leads up to slabs and the glacier. Follow the South East ridge directly up. The crux is a steep slope that tops out less than a hundred meters from the summit. Sidle around the North side of the peak and scramble to the summit from the West. Rating: III, 2 Download GPX File Google Maps Location Mount Barff South East Ridge Route Topo Authors Note: This is a trip report from 2015 when I first began my mountaineering journey. It was a powerful experience that I wanted to write about. Please note the beta provided is relevant and up to date. It has almost been ten years since my friend Sam and I climbed Mount Barff. Since then I have climbed and explored the world, but this remains one of the most memorable trips of my life. I think a lot has changed with mountaineering in New Zealand in that ten years. When I first arrived here in 2014/2015, it seemed like the mountaineering community was non-existent and huts were still empty. I remember hiking up to Brewster Hut in the middle of summer to climb Mount Armstrong and I had the entire hut to myself. Another memory of climbing Mount French that same summer with one other person in the hut. When I showed up here ten years ago information was very hard to come by and you could feel just how wild the Southern Alps were (and they still are wild ). I originally found Mount Barff because of the fantastic write up from Danillo Hegg. Convinced this climb was within our capabilities, we packed our gear and drove to Raspberry Flat. Sam at Shovel Flat. Mount Barff is just visible at the upper left of the photo. It was a stinking hot summer day as we walked up the West Matuktuki. Although not the hottest place in the world, the sun here is brutally strong. We walked past the stunning Rob Roy Glacier, past livestock, and approached Aspiring Hut for a break. Out of the bushes came the hut warden, brushing himself off as he had been lying on the ground. I'm searching for Kiwis! Did you spot any? Yeah, two little ones! He walked closer and examined our gear as he inquired about our destination. His eyes ravished our new Mammut Infinity 9.5mm dry-treated rope and began to caress it like a woman that had stolen his heart. Wow....an amazing rope... That hut warden, God bless him, was an example of what it's like to be fully immersed and fully alive. With newfound energy, we continued up the valley to Shovel Flat, onwards to Pearl Flat, and then eventually up the steep track to Liverpool Hut. Drenched by sweat we offloaded our gear and looked up towards Barff, immediately intimidated. Mount Barff from Liverpool Hut A few other tourists began to arrive at the hut and were taken aback by the ice axes and rope. What are you guys going to do with that? We pointed upwards towards Barff. Are you serious? Are you afraid of dying? I puffed out my chest as best I could and casually said we got this. Truth be told I was shitting my pants. Barff looked pretty ugly at this time of the year. The glacier was a minefield of crevasses. We spent the afternoon relaxing and enjoying the scenery. The hut is placed in a commanding location with views of the West Face of Rob Roy and the North Ridge of Mount Liverpool. Sam and I used the remaining daylight to scout out the access route to the South East Ridge which would prove to be an excellent decision. I can't remember the time exactly, but our alarms went off very early in the morning. We quickly grabbed our gear and made our way out the door. Just before leaving, someone from the hut whispered to us good luck! I still laugh every time I think of our experience there. The tourists in the hut were more nervous than we were! With headlamps on we followed the route we had scouted the day prior. We climbed the gully that led up to the glacier where we took out crampons and ice axes. The day was gorgeous and there was not a breath of wind. I could feel the wildness of the Southern Alps in my bones. We climbed the South East ridge until crevasses forced us to take the rope out. Crevasses on Mount Barff Near the top of the ridge, the pitch steepened significantly. My stomach dropped. Sam was visibly nervous. I elected to lead the crux pitch and took out my second tool. Except it wasn't even my tool, but from a friend who let me borrow it! We hammered in a snow stake and set up a belay station for Sam. I lead out. A fall to my left would send me tumbling toward massive crevasses on the South Face. A fall to my right would be over bluffs. My heart was pounding. I focused on my tool placements and remembered right towards the top of the pitch thinking, we got this. At the top, I stood up and shouted for joy. I was twenty-two years old and it was the most radical thing I had ever done. At that exact moment, the sun rose above the Bonar Glacier and illuminated the entire mountain in golden light. It was a moment, a memory, etched forever into my soul. Topping out on the South East Ridge of Mount Barff Sam followed shortly and we embraced at the top of the pitch. We sidled around the north side of the mountain and easily scrambled up Barff from the West. The summit was a mix of feelings. For one, we were stoked. But even more so we were just plain scared. This climb had been a big undertaking and honestly, we didn't have the skills to be up here, and we knew it. We didn't stay on the summit for long and were nervous about the down climb of the crux pitch. I belayed Sam down and, with heart in mouth, followed. I can still remember the feeling of relief after getting down from the ridge. Like a shirt that has been wringed of water. A few hours later we arrived back at the hut, totally exhausted. Climbing back towards Liverpool Hut after a successful summit of Mount Barff After a nap, food, and water we knew we had to go. The hike out was going to suck and we had no idea that you could bike to Aspiring Hut. Lesson learned! I vividly remember the pain in my feet as we walked, hobbled, and limped down the track. At Aspiring Hut, we sought out the warden to let him know of our successful climb. How'd you boys go? We did it! It was epic! Nicely done! You should've seen the look on all of the tourist's faces. One by one they stopped through the hut to tell me two madmen were going to die on Mount Barff! What? Are you serious? What did you say? I told them to relax. Once I saw the rope you guys were carrying, I knew you'd be okay... Man, that hut warden. What a complete legend. Sam and I laughed our asses off as we hobbled back to the car. What's even funnier is our friend Alex had been waiting for us at the car for over five hours. He was on his own mission up the valley and since we all shared the car, we organized a meet-up time. We told him we would be back by early afternoon but instead, we got back in the evening. While he was waiting he went from being concerned, to pissed off, to maybe concerned again, to just straight angry. Because we had the keys, some guy in the parking lot felt bad for him and he wound up giving him a beer! I can still look back on this trip over a decade later with a huge smile on my face and I hope it inspires you to find your way to the summit of Mount Barff. Happy days...
- Bold Peak
Date: July 23, 2024 Location: Humboldt Mountains, Mount Aspiring National Park, Otago, New Zealand Total Trip Distance: 14.1 mi / 22.7 km Total Elevation Gain: 6,561 ft / 2,000 m Trip Duration: 11 hours Team: Henry Frakes Field Notes: Bold Peak is a beautiful pyramid shaped peak that sits just southeast of the powerful Mount Bonpland. Climb the Glacier Burn trail until popping out of the trees at 800 meters. Head up the Glacier Burn until angling south, climbing a massive 800 meter gut filled with very loose rock to Point 1731. Climb across a broad shelf (with excellent camp spots) until snow slopes lead to a col south of Point 1973. Sidle around the back of the ridge and scramble up loose rock until gaining the north ridge. Scramble to the summit. Care should be taken on the descent in the gut. Rating: I, 1+ Download GPX File Google Maps Location Bold Peak Route Topo Almost ten years ago my friend Sam and I had stood at the col south of Point 1973, roughly two hundred meters from the summit of Bold Peak. It was at this point we decided to turn around mainly because of two reasons. First, because Sam had to be back in time for a job interview (where he got hired and then didn't take it). Second, because we were scared. That wasn't the first time we spooked ourselves on a climb. Ten years earlier... Sam retreating from Bold Peak Later that year we attempted Sharks Tooth Peak, a straight forward climb straight out of the parking lot. We chose the wrong ridge on the ascent and found ourselves on steep bluffs. All we had to do was down climb and get on the appropriate ridge to continue the climb, but we got scared. Those early days of mountaineering were so memorable because we didn't have a clue what we were doing, so the fear was there out of ignorance. Every mission felt huge. Flash forward ten years and Henry and I stood at the same exact spot at the col south of Point 1973, debating whether to continue. There was no fear present, rather, an awareness of the conditions and ourselves. The climb had taken longer than expected due to the fact that the snow was simply terrible. We made good time up the horrendous terrain of the gut, however, once we donned crampons it was a miserable post hole. Almost every step sunk through to our knees on an unsupportive surface layer. It didn't help we were climbing two thousand meters in a day either. "We are late," said Henry. He was right. It was completely bluebird, the sun beaming. The snow had warmed and it was almost noon. Our main concern was retreating back across where we came. Old avalanche debris from the east facing slopes of Bonpland reminded us of what could happen. One thing I love about climbing with Henry is the openness in conversation. He is calm, collected, and realistic in the mountains. He speaks from experience rather than fear or ignorance. He is very fit so I know he is not completely exhausted and subconsciously wants to turn around. We bounced the conversation back and forth. Ultimately, we continued on and we felt right about it. The main slope we were concerned about was actually in the shade, staying cool for the descent. What we did do, was set a turn around time. If we weren't on the summit by 12:30 we would head back. Climbing to gain the north ridge of Bold Peak. Mount Bonpland behind. From the col, we leapfrogged each other setting steps to the summit. The views from the north ridge of Bold Peak were fucking epic. Mount Bonpland towered above like the God of the Humboldt Range. We plugged steps up to the summit ridge, scrambled on loose rock, and walked to the top of the peak. Wow, that felt good. Legs burning, heart pounding, and fist bumping with Henry. Life in the alpine can be a mystical experience. Mount Bonpland from the summit of Bold Peak We snapped a few photos, had a quick bite to eat, and left. We stood on the summit for about five minutes. It was relatively quick work to get back to the top of the gut and we decided to give ourselves a genuine break. We had barely stopped for almost seven hours. My appetite was low, but I forced myself to eat and drink, knowing the consequences of a poor recovery. With reluctance we headed down the gut, excited for our feet to touch the beautifully sculpted Glacier Burn trail. Arguably the most dangerous part of the day, I dodged a few rocks and took a spill that sliced my finger open when a pile of rock collapsed beneath me. Care has to be taken here! We arrived back at our vans eleven hours later, treated to an incredible sunset over the Richardson Mountains across the lake. Grateful, stoked, and ready to consume a generous portion of food. Happy days... A beautiful end to a long day
- Black Peak
Date: October 18-19, 2023 Location: Richardson Mountains, Whakaari Conservation Area, Glenorchy, Otago, New Zealand Total Trip Distance: 16.4 mi / 26.39 km Total Elevation Gain : 7,520 ft / 2,292 m Trip Duration: 2 days Team: Solo Field Notes: One could complete this in a very long day but I opted to stay in the beautiful McIntosh Hut, perched 1,000 meters above the valley floor. From here, the hut gives easy access to the slopes of Black Peak. I ascended the easy wind scoured west ridge until it met the summit ridge. From here, it was an exposed scramble needing axe and crampons (early season). Rating: 1, I Download GPX File Google Maps Location McIntosh Hut and Black Peak Route Topo A dream has finally materialized and I am back in New Zealand. So many years of patience, focus, determination and training has gotten me back to a point where I can climb these mountains again. I am home. In typical New Zealand fashion, the weather has been pretty awful my first week here. The avalanche rating was high and the idea of going after anything above 2,000 meters was a no in my decision making process. The storm dropped a meter of snow above 2,000 meters with strong winds so I opted for something "smaller." There really are no "small" mountains in New Zealand, but relative to the other peaks around. For my first trip back I decided on Black Peak in Glenorchy. I made the hypothesis that with the strong Westerly winds that came with the storm the ascent would be mainly snow free and avalanche hazard low. Secondly, there was a hut to spend the night in and if Black Peak was off, I would have a backup option to scramble up Mount McIntosh. Off I went under bluebird skies on a perfect Wednesday afternoon. I arrived at the trailhead, parked my car, and then walked down the road towards Glenorchy across the bridge. Once across the bridge, I picked up a track through the bush indicated by a piece of flagging tape. From here it was about a four hour slog to the hut following a farming fence line indicated by orange markers. I forgot how steep New Zealand farm country is. As I followed the track, the views immediately opened up of the Humboldt Range - Bold Peak and Mount Bonpland towered above. All of the peaks were coated in a fresh coat of white. Stunning Temple Peak I arrived at the hut just under four hours. I began my cool down ritual of stretching, hydration, a recovery drink, protein, and some breath work. Everything was still. No one was around. McIntosh Hut is an older miners hut and there are still remnants of those that lived here many years ago. As I lay in the top bunk, I drifted into a state of half awake half asleep. Almost hypnotic. I felt I could've slept for fourteen hours but instead it was just one. It was 7pm and time for dinner and sunset. The view from the top bunk I made dinner and sat outside in the fading sun. The light went golden and out came the camera. It felt great to be back in these hills. McIntosh Hut and the Humboldt Range I woke up the next morning around 4:30. There is a distinct difference in sleep quality when in a hut vs a tent. Knowing I needed to burn a few hours before first light, I fired up the stove to have some coffee. I light the candles and enjoyed the pre-dawn solitude. At first light, I slipped into my mountaineering boots and plodded North to the slopes of Black Peak. It was easy going even though I post-holed a bit through crusty snow. The track follows an old miners road. Once at the base of Black Peak, I gained the mostly snow free west Ridge of the peak and plodded straight up to the false summit. At the top, the final 20 meters proved to be the crux and I'm very glad I brought crampons and an ice axe. The summit ridge was an exposed and airy corniced ridge. A fall to the left would be very bad, a fall to the right could potentially set off the cornice and an avalanche. I put on crampons, grabbed my axe, and chose to stick to the climbers left to avoid the cornice and the wind loaded easterly slopes. The summit ridge of Black Peak Two fun and exciting minutes later I stood alone on the summit of Black Peak. The views were fantastic. Mount Earnslaw and Mount Tutoko dominated the skyline. I spotted Mount Alaska, Mount Larkins, Temple Peak, Turret Head, Somnus, Momus...endless!!! I didn't stay too long as the summit was very cold and windy. I made my way back across the ridge to the false summit and took off my crampons. I kept my axe handy and made my way over the snow covered portions of the mountain. I chose to glissade down the peak and was at the bottom in about 10 minutes. Happy days! My tracks in the perfect morning light I made quick work back to the hut, refueled, packed my things, and made the three hour romp back to the car park. It was a stunning afternoon and a stunning end to a perfect trip. Thank you to everyone who helped me get back here. I was totally buzzing. The trip ended in typical fashion - a cold plunge in Lake Wakatipu and a delicious smoked pork sandwich (and banana bread) from Mrs Woolly's General Store. All I can say is... happy days...
- Camp Peaks
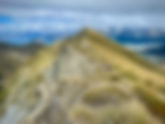
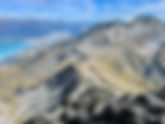
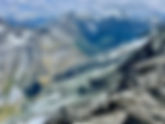
Date: December 8, 2025 Location: Hāwea Conservation Park, Haast Highway, Otago, New Zealand Total Trip Distance: 7 mi / 11.3 km Total Elevation Gain : 5,593 ft / 1,705 m Trip Duration: 5 hr 31 min Team: Solo Field Notes: Park your car at the parking lot at Camp Creek. Walk back up to the main road, cross the bridge, and take the track which starts on the true right of Camp Creek. Follow this steeply until it breaks out of the bush line at 640 meters. Follow the southwest ridge towards Point 1408, sidling this on either the west or southern aspect. Continue along the ridge to the summit, which is best climbed from the south. Grade: 1, I Camp Peaks is an objective I’ve always been interested in as a day strike because of its proximity to Queenstown and the access is right off the road. This is one of those mountains where, once you start, you’re only going uphill. No messing around. Unfortunately, Deanna flew out the day before, but on the plus side, the weather had cleaned up significantly. With one day left before jumping back into work, this felt like the perfect time to go up Camp Peaks. There was no need for unnecessary weight on this one. A light shell, some water, snacks for the day — that was all I needed. The track starts on the true right of Camp Creek, just near a small pullout on the side of the road. It kicks off steeply, and I’m incredibly grateful to whoever cut it, because the scrub here is absolutely heinous. The trail ends around the 640-meter contour, where it breaks out of the scrub into open tussock. From there, I continued straight uphill on steep tussock slopes. There was no respite, but I felt strong and moved quickly. I climbed the first 700 meters in under an hour and continued on feeling really solid. As I gained height, the views opened up across the lake toward the Minaret Peaks and the Albert Burn. Just under Point 1408 is the first obstacle of the trip. I chose to sidle around it on the western aspect, though it would be just as easy on the southern side. From there, I continued roughly along the ridge, and this was where the summit finally came into view. I kept moving fast, scampering toward the summit. The final section is the crux, with a few scrambly bits and some false summits. There are three prominent bumps, all of which look about the same height, but the true summit is the farthest one to the east. Peak 1999 on the right and Teat Ridge from Camp Peaks I scoped out my options and scrambled up via a steep, exposed section. Personally, I think the better route is to sidle all the way around to the south, scramble up a loose scree gully, and then walk the short slab to the top. That’s the way I descended, and if I were to do it again, it’s the route I’d take. I spent about 30 minutes on the summit, lounging, eating snacks, resting, and taking in the views. It was a perfectly beautiful day. My favorite view was actually to the north, toward Point 1914 and Teat Ridge, though Sentinel Peak looming above Camp Creek was equally impressive. Eventually, I pulled myself away. The sun was ripping, and I was only in a T-shirt instead of my usual sun hoodie. I scampered back down, shocked by just how hot it was. Summer is truly here. Down I went, fighting the heat, until I finally started running downhill to get away from the sun. I made it back to the car in 5.5 hours round trip, immediately stripped off my clothes, and jumped into Lake Wanaka for an incredible post-trip swim. Happy days...
- Temple Peak
Date: February 8, 2025 Location: Richardson Mountains, Glenorchy, Otago, New Zealand Total Trip Distance: 13.62 mi / 21.9 km Total Elevation Gain: 6,568 ft / 2,002 m Trip Duration: 8 hours 53 min Team: Alex Catalfamo Field Notes: As of writing, the route described in the new Mount Aspiring Guidebook is non-existent, so Neil Sloan has updated me on the current situation: the section alongside Precipice Ck from the carpark leads to where the creek gushes out of the gorge. Don't continue uphill on the formed track, but climb a mini scree slope of old gold workings into the beech forest. No sign indicates this entry point. The track zigzags steeply up past a large water tank and may be marked with track tape. The gradient eases and the beech is open, but is better to jump the fence here. From here, join a 4wd track heading North, and then travel East directly up to Precipice Hill. Follow a rough trail along the ridge north towards Temple Peak. Sidle under Point 1856 at the 1600 meter contour. Then follow an old 4wd track and animal tracks to just below the summit of Temple Peak. Sidle forty meters below the summit on the north, before a gully gives easy access to the top. Rating: I, 1 Download GPX File Google Maps Location Precipice Hill and Temple Peak Route Topo Alex is back! Our last trip together was an incredible four-day trip through the Pasayten Wilderness back in late September of 2023. Man, it feels good to have one of your best mates back. And even better he is super fit. We decided upon a trip that was non-technical, direct, and would allow light packs. I've been working through the Richardson Mountains and figured Temple Peak would be a fun trip. Alex with Turret Head and Mount Earnslaw behind Sunday was calling for poor weather and Saturday had a chance of going either way, so being in the Richardson's made sense. I've found that if the weather in the Aspiring Region is 50/50, the Richardsons typically get hit last which would give us more time up our sleeve. My observation was confirmed as we made our way up Precipice Hill. As we climbed up to our first summit, the mountains of the Routeburn and Dart Valley were entirely clagged in by rain clouds while we were under a scorching sun in the Richardsons. Looking into Temple Burn from Precipice Hill It took us two hours and fifteen minutes to reach the summit of Precipice Hill and the views were surprisingly amazing. Black Peak, Mount Larkins, and Stone Peak were visible to the South. The Humboldt Mountains stood proudly across the lake, and the mighty Mount Earnslaw to the North. Our favorite view was looking up the Temple Burn. Cloud began to spill over the lake and the wind picked up a few knots so we decided to keep moving. The ridgeline from Precipice Hill to Temple Peak is some of the best scenery I've experienced in a long time. Alex made for a great subject when it came to taking photos. Alex on the scenic ridge to Temple Peak. Precipice Hill behind. The terrain under Point 1856 looked ugly and without helmets, we opted to sidle under the high point. Plus, there was a solid ground trail to follow. We joined the North West Ridge of Temple Peak at 1,660 meters and continued upwards. I had set a strong pace for the day and felt like I had wings. It was one of those days. Meanwhile, Alex hadn't set foot on a mountain since our last trip in September 2023 and showed his strong fitness by keeping up step for step. We were on the summit in under five hours since leaving the car. To get to the summit, we walked up the West Ridge to about forty meters below the summit and followed a scree shelf on the northern side of the mountain. When hard under the summit, we walked up a scree gully to the summit ridge which gave easy access to the top. At the summit, we enjoyed a quick view before clouds swallowed us in. Just in time. We hung out for a bit, ate some lunch, and decided we should keep moving. The trip back to the van was uneventful. The clouds spit rain at us from time to time, but we loved the cool breeze and cloud cover. Back along the ridge to Precipice Hill the views were amazing and I'll let the photo below speak for itself. It's great to have 'Talf back. Happy days... Powerful scenes from the ridge line. Tooth Peak center image.
- Meg Hut
Date: November 29 - 30, 2025 Location: Pisa Range, Cadrona, Otago, New Zealand Total Trip Distance: 9 mi / 14.5 km Total Elevation Gain : 3,083 ft / 940 m Trip Duration: 2 days Team: Deanna Luu Field Notes: Park at Tuohys Gully carpark and follow the 4WD track up to the saddle just west of Point 1202. Then follow the track down heading southeast to Meg Hut. Bring firewood. Photos: Deanna Luu I was so happy to have Deanna back! The last time she visited, we had an amazing trip up to McIntosh Hut. This was the second time Deanna had come to visit me, and both times her goal was the same: to spend a night in a backcountry hut in New Zealand. I had bigger aspirations for this trip, but as often happens in New Zealand, the weather had other ideas. Rain seemed to be falling almost everywhere. That said, I’ve noticed that the areas around Wanaka and Queenstown often miss the worst of it, so I decided to take us to Meg Hut — a short, straightforward trip to a place I’d never been before. The journey was simple. We walked up the four-wheel-drive track toward the hut on a mostly gorgeous, though slightly cloudy, day. We gained elevation steadily and slowly, setting a casual pace and enjoying each other’s company. Travel to Meg Hut is very straightforward. It’s a farm track that climbs roughly 650 meters before dropping about 200 meters down to the hut. Once there, though, the setting is spectacular: rolling tussock hills, a beautiful stream running past the hut, and a peaceful location. I’d hiked in firewood, and even though the temperatures weren’t expected to drop too low, we couldn’t pass up the novelty of lighting a fire inside the hut. We spent the rest of the afternoon lounging in the sun, cracking jokes, doing some breathwork, and I made a half-hearted attempt at a cold plunge. As the sun began to set, we lit the fire and enjoyed the simplicity of the moment and each other’s company. That night, we slept incredibly well. Meg Hut, Pisa Conservation Area In the morning, the early sun was warm. We sat outside with our coffee, soaking it all in. The walk back to the car was quick and easy — light work. Meg Hut makes a perfect short overnighter and is a great option for anyone looking to get away and spend a peaceful night in the hills. Happy days...
- Mount Bonpland, North Ridge
Date: November 23, 2025 Location: Humboldt Mountains, Mount Aspiring National Park, Otago, New Zealand Total Trip Distance: 11.3 mi / 18.2 km Total Elevation Gain: 7,251 ft / 2,210 m Trip Duration: 13.5 hrs Team: Rob Fraser Field Notes: Take the Glacier Burn Track up until it ends at the treeline. Staying on the true left of the Burn, continue up to 1,600 meters until you sidle onto the Bryant Glacier, which provides access to the North Couloir. The couloir is 300 meters long and steepens to about forty-five degrees. At the top of the couloir, an awkward slab is encountered, which leads to a 10m high step. Some parties may or may not pitch this (grade 11). Once past this, climb the steep and narrow ridge until the false summit. Beyond this, climb steep snow to the obvious notch in the ridge. Rappel for 25 meters down to a ledge and walk up to the true summit. Return to your rope and climb a grade 14 crack back up to the notch. Retrace your steps back to the couloir where the 10m step can be rappelled. The rock is notoriously loose in this range, and the North Couloir has high objective danger. Grade: III, 3 Mount Bonpland stands at 2,343 meters and is the tallest mountain in the Humboldt Range. When viewed from Glenorchy, it’s not easy to distinguish the summit, as the east face rises in one gigantic wall. It is a beast of a mountain. After skiing the Somnus Couloir just a week prior, Rob and I were thinking about another ski-focused trip. The Glacier Burn provides fantastic access, and I was originally interested in some of the couloirs off Bonpland. For over a year, I’d also been interested in climbing Bonpland. The North Couloir provides rapid access to the North Ridge, and I knew time was running out before the couloir became dangerously out of condition. I hit up Rob: let’s go alpine climbing instead. We swapped skis for a trad rack and decided on another midnight start — just seven days after our last one. With two hours of sleep, we left the van at 12:30 in the morning. The stars shone brightly above. Bonpland rose high in the distance. The temperature was cold — we would definitely get a freeze. Headlamps on, we set off. Rob climbing the North Couloir on Mount Bonpland at sunrise. Travel was quick up the Glacier Burn track, and before we knew it, we broke out of the treeline. A dirt trail turned to a boulder field. A boulder field turned to snow. We stashed footwear and put on crampons. Bonpland is a big objective, and I know many strong climbers who’ve taken multiple attempts on this peak. The Bryant Glacier is a war zone, with avalanche debris on every aspect. Beyond avalanches, the rock in the Humboldt Range is notoriously terrible, and rockfall is common. This is why we started so early. We wanted to be at the top of the couloir exactly at sunrise, and off it as quickly as possible. Slow is smooth and smooth is fast was our motto for the day (credit to Rob, who credited it to the Navy SEALs) — and it’s a motto I’m going to embed into my climbing forever. We set a consistent pace from the trailhead and never broke it. By the time we topped out on the North Couloir, we had climbed 1,900 meters and felt very fresh. Things were lining up. The sky was clear, winds were light, the snowpack was bomber, and we were moving well. The North Couloir is steep — maybe forty-five degrees — but not beyond fifty. At the top of the couloir is where the technicality began. Immediately, an awkward slab is encountered, which many parties might pitch out. We opted for a short downclimb on very steep snow to cross the base of this slab. Then we encountered the 10-meter step that probably goes at grade 11 for a move. We were fortunate to have snow buildup at the bottom, which made the crux significantly easier, and we opted to solo it. Without the snow, the rope would have come out. At the top of this step, our confidence boomed. We sidled along the exposed ridge, climbed another pitch of steep snow, and found ourselves walking along the false summit. The North Ridge is fucking epic — we were truly absorbed. This was some of the best climbing of my whole life. Rob rappeling from the notch on Mount Bonpland At the false summit, we spotted the final obstacle: a traverse across steep and exposed snow to the notch where we would rappel twenty-five meters. The snow felt straightforward, but a fall would mean a ride down the entire east face. Gingerly, we climbed across. If I were doing this again, I would take out the rope — you climb directly to where you’re going to rappel anyway. We found a solid horn of rock to build an anchor using a 240 cm sling, set ourselves up for the rappel, triple-checked everything, and went down. I rappelled first to clear loose rock. Rob followed. At the ledge, I smiled one of the biggest smiles of my whole life — we were going to summit. We walked sixty seconds to the high peak and embraced. What a moment. I checked my watch: seven and a half hours to the summit. There are days when nothing goes right — mindset off, gear lost, weather craps out. And there are days where everything aligns — mind, body, soul, team, mountain. This was the latter. We hung out for maybe five minutes to have a quick bite, snap some photos, and stare into the mystic. Rob reminded us: we are halfway. We returned to the rope, climbed the grade 14 crack at 2,300 meters, and pitched the steep snow back to the false summit. We continued moving. It was just past eight in the morning and the sun was ripping into the east aspects. We retraced our steps along the exposed ridge until we reached the 10-meter step. I got out some cord, built an anchor, and set up the rappel while Rob organized gear. Off went Rob, and I joined him shortly after. We were almost out. Now we talked non-stop about the snow conditions in the North Couloir, paranoid about its safety. We had one final crux across the steep slab, and then we found ourselves at the top of the couloir at 9:45 a.m. Shit. I’d wanted to be there earlier. Rob began the down climb. The snow is shit, he said. It was extremely hot now. I followed Rob, taking care with every placement. The snow was indeed wet, but as we continued, we found it was still safe enough. I was more concerned about rockfall than an avalanche in the couloir. At the apron, the snow truly turned to shit. We were sinking up to our waists, and we opted to glissade all the way to the massive flat area at the bottom of the “glacier.” Finally away from most of the danger, we organized gear and prepared for the long walk down. We continued on, following the Glacier Burn down to a beautiful grassy bench beside a glacially fed stream. I looked up at Bonpland... Was I dreaming? Had we really been climbing along that lofty ridge just a few hours ago? I dunked my head into the stream to get an answer. We had. It was a magic day. Happy days…
- F-Knob, Ocean Peak, Xenicus
Date: July 5 - 7, 2025 Location: Serpentine Range, Mount Aspiring National Park, Glenorchy, Otago, New Zealand Total Trip Distance: 23.19 mi / 37.3 km Total Elevation Gain : 9,661 ft / 2,945 m Trip Duration: 3 Days Team: Rob Fraser Field Notes: For F-Knob, start from Routeburn Falls Hut and head West until you reach the first bridge. A ground trail initially heads south, bypassing the bluffs to the east and ending near a group of tarns. Gain the North East Ridge and follow directly to the summit. To get to Ocean Peak, follow the obvious ridge line heading West, sidling difficulties on the north. For Xenicus, start from Falls Hut and climb above the hut into the valley. Cross the Route Burn, and head straight up a gully that eventually ends at 1,500 meters. Sidle around the South East Ridge on the Eastern side, gaining the ridge at 1,800 meters. Grade: I, 1+ Download GPX File F-Knob, Ocean Peak, and Xenicus Route Topo It's been a long while since I got stuck into a proper summit. June didn't provide much in the way of weather and I found myself skinning up Coronet Peak for fitness most of the time. May was filled with tramping, and April I was in Dunedin surfing. The last big trip in the hills was March 20th, when Alex and I did a speedy one-day ascent of Mount Tyndall. Work has also been busy, so when I saw three days in a row of perfect weather, I knew I needed to be outside for all of them. My soul was burning for it. We still need another good storm to properly open up some bigger ski touring/mountaineering days, so I left the sticks at home and wandered up the Routeburn. There are quite a few peaks there I haven't managed to climb yet, and the area is jaw-dropping. From the North East Ridge of F-Knob. Somnus, Momus, and the North Routeburn are on the skyline. I walked in to Falls Hut on a beautiful Saturday afternoon and was surprised to see about twenty other hikers there. I didn't mind the company - we are all there for the same reason, and I was grateful that someone had put in the effort to stoke the fire. I planned to climb F-Knob and take the ridge line over to Ocean Peak. Then on Monday morning, Rob was to meet me at Falls Hut, and we were going to climb Xenicus. I knew there wouldn't be a ton of snow up there, but I was surprised to see how little there actually was. From the summit of F-Knob. The Forbes Range and the Richardson's are on the skyline. In fact, I didn't put crampons on until twenty meters below the summit of F-Knob. The ascent was easy enough, although steep, and it was surreal to be high above the valley floor. The weather conditions were absolutely incredible. Sunny, low cloud in the valley, and the faintest breath of wind. Although these summits don't even touch two thousand meters, the scenery has got to be some of the best in the Southern Alps. I put my crampons on for the final twenty meters and front-pointed to the summit. From here, I looked over to Emily Peak which Alex and I had done earlier in the year. The temperature was rising so I kept moving towards Ocean Peak, following the easy ridge traveling West. At Point 1820, the snow was getting quite warm and I knew I needed to get over to Ocean Peak sooner rather than later. The climbing looked tricky over this section, so I followed a ledge system at 1700 meters that took me to a small basin just below the summit. From here, I booted up a gully to join the South West Ridge. I climbed higher until I met an awkward step that forced me onto the face. With exposure below, I front-pointed up to the summit. My eyes were drawn towards the wild peaks of Fiordland, especially Tutoko. Knowing it was only getting warmer, I left the summit quickly and made my way down. The Serpentine Range from the summit of Ocean Peak. Xenicus is in the foreground. Back at the hut, I immediately started boiling water as the hut was entirely devoid of the sun and was cold. I did my best at starting a fire with damp wood and coal, and after hours of work, wondering why the hut wasn't warmer, I was dismayed to find out that there were windows at the top of the hut that were open the entire time. By seven thirty, I crawled into my sleeping bag and called it a night. For the two nights I slept at Falls Hut, they may have been the best back-to-back nights of sleep I've ever had in the backcountry. I slept soundly, only waking up occasionally. Rob arrived at half past seven and I made him a coffee as promised. We started back up the Routeburn track, crossed the River, and headed north up through low scrub. Travel was not difficult by any means and we were glad to hit the snow. It was awesome having Rob up here - he's super fit, grounded, and has a great mindset. At 1,500 meters we sidled around to access the South East Ridge of Xenicus. It looked very straightforward, minus one little cruxy section. We cramponed higher, swapping places when the person in front needed a break. We arrived at the crux just below the summit and it wasn't ideal. There were sections of ice in a short gully with plenty of exposure off to our left. This is why conditions are almost everything in the mountains. We were both keen and tackled the crux, being diligent with our placements. At the summit, we congratulated each other, snapped a photo, and then headed back down. The crux required extreme care, and I wish I had a second tool. However, with patience, it was managed just fine. Rob climbing the final few meters to the summit of Xenicus At the bottom of the climb, Rob busted out a few of his girlfriend's homemade cookies, and I can confirm it was a borderline religious experience. Thank you, Daisy. We made quick work back to Falls Hut where we swapped mountain boots for hiking boots, and then continued on to the car park. It was a hell of a day and a hell of trip - and I celebrated with some much-needed Indian food back in Queenstown. Happy days...
- Headlong Peak
Date: July 19 - 20, 2025 Location: Harris Mountains, Mount Aspiring National Park, Otago, New Zealand Total Trip Distance: 25.2 mi / 40.4 km Total Elevation Gain : 8,624 ft / 2,629 m Trip Duration: 2 Days Team: Rob Fraser, Kevin Reid, Emilie Agnew Field Notes: From Shelter Rock Hut, Headlong Peak is a long climb - and even longer with ski gear. Climb to the top of Rees Saddle and then head north along Snowy Creek on the true left. The most convenient location to cross is about 1.3 km from Rees Saddle and about .7 km from the Snowy Creek Bridge (which is removed during winter). Snowy Creek is impossible to cross in most areas, and it pays to give yourself time to find the correct location to cross, especially in the dark. Once across the creek, take the broad west spur to the summit. There is one short section near the top around 40 degrees. Grade: I, 1 Headlong Peak Route Topo Although it hasn't snowed much in New Zealand so far this season, we have had plenty of clear, cold days. Another high-pressure system rolled in for the weekend, lining up perfectly with our schedules. We had a great team assembled for this trip: Rob, Kevin, and Emilie. Fortunately, we were able to utilize Kevin and Emilie's four-wheel drive truck to get up the Rees Valley. Rob biking up the cold Rees Valley Rob and I wound up biking as we had a later start to the day. But fortunately, Kevin and Emilie brought our ski gear and packs in their truck. up the valley. From there, it was only a two-and-a-half-hour hike to Shelter Rock Hut, where Rob and I spent the entire time talking about whether Kevin and Emilie would have the fire going upon our arrival. Funny enough, we arrived at the hut exactly when Kevin and Emilie had just gotten back from skiing Mount Cunningham. Kevin tried his best to get the fire going, and after a brilliant effort, he proved successful. We shared dinner together and talked about our plans for Headlong Peak. We decided to get up at the ungodly time of two o'clock in the morning with the intentions of being out the door by three. It was a frosty start, and we headed up the valley on dry ground. I find it's always difficult traveling in the middle of the night, where you can only see the silhouettes of the mountain peaks, the stars above, and the ground in front of you illuminated by a headlamp. It can be disorienting and at times frustrating, which shows us how influential the power of light really is. Near five a.m., we got under Rees Saddle and boot packed our way to the top. We saw the nasty gut of Snowy Creek, which we assumed would be one of the cruxes of the trip as we were attempting to find a safe passage in the dark. The team skinning up the West Ridge of Headlong Peak. Rees Saddle behind. I was very confident in the route that I had found based on reading the topography and viewing satellite imagery. I led us north along Snowy Creek, at times losing faith, until we came upon the spot I had indicated on the map. It went! We dropped down to the water, walked across the creek in our ski boots, and attached skins. The excitement was building now as the climbing had finally begun. At this point, we had been traveling for close to four hours, and we still had a 1,200-meter climb ahead of us. Climbing the West Ridge of Headlong Peak. Cleft Peak center is at center image. I set off starting the skin track up the West Ridge of Headlong Peak, and we were immediately relieved to find very light and soft snow. And the higher that we traveled, the better the snow became, and the more the stoke built. And then, obeying the eternal rhythm, the sun rose and splashed colors of pink and red onto the tops of the peaks. Setting a skin track on a big day is always hard work, and we rotated to keep things efficient. Towards the top, we were beginning to feel the effects of a long day. We were already seven hours in and still had a few hundred meters left to the summit. On Headlong Peak. Mount Cunningham is at center image. There was a section of steeper terrain close to the summit that we had to navigate. Once past this crux, we were knocking on the doorstep. Although we were only one hundred meters away, it looked so far away. Sure enough, just as we popped over the rise, the summit was right in front of us. Thirty steps later of boot packing, we found ourselves on top of the peak. It was one of the best feelings that I had experienced in a long time, as it had taken us eight hours of hard work from the hut to reach the top. The final steps to the summit of Headlong Peak We were absolutely stoked to be sharing an incredible summit together with not a soul in sight on a beautiful, sunny winter's day. We were also aware that there was hang fire in the valley from the slopes above and things were heating up, so we wasted no time. We clicked into our skis and all took turns right off the summit. From that point on, we hooped and hollered as we leapfrogged each other down the mountain, skiing for the most part, in fantastic conditions down to the valley floor. This is truly what we live for! Back at Snowy Creek, everyone was buzzing. We attached skins, climbed out of the creek, and made our way back to Rees Saddle. At the top of the saddle, we clicked in for the last time and made turns back down to the snow line. We arrived back at the hut over thirteen hours later. Although we all wanted to sleep, the sun was setting. So we packed our bags, refueled, and got ready for the two-plus-hour hike back to the truck. Rob and I led out first, with Kevin and Emilie trailing just behind. Rob and I, which seems to be customary on all of our trips, engaged in deep and thoughtful conversation, interspersed with laughter and jokes, to pass the time. We were both feeling completely worked. By the time we had gotten back to the truck, it had been sixteen hours. We started in the dark, and we ended in the dark. Thankfully, Kevin and Emilie's headlamps emerged from the trees - it was time to go home! We loaded up the gear in the back of the truck, and bumped our way out the Rees - eyes and bodies burning from exhaustion. The team: Emilie, Rob, & Kevin This was one of my favorite trips in such a long time, not just because the skiing was fantastic, but because the company was sensational. The whole trip was filled with laughter and stoke - and a reminder of the power of good relationships. Happy days...
- MK Gully | Remarkables
Date: August 3, 2025 Location: The Remarkables, Queenstown, Otago, New Zealand Total Trip Distance: 3.3 mi / 5.3 km Total Elevation Gain: 1,932 ft / 589 m Trip Duration: 7 hours Team: Emilie Agnew Field Notes: The classic M3 route on the West Face. 150 meters, 4 pitches. Bring a full trad rack. An ice screw or two might be useful depending on conditions. Grade: M3 The West Face of the Remarkables has always held some sort of mythical allure for me. Almost every day I stare at it, knowing it holds quality climbing, yet I’ve never ventured out there. This winter has seen a disappointing amount of snowfall so far - so disappointing that it has led me to question how much longer I will stay here. One benefit of this, at least in winter, is that low snowfall means other opportunities open up, such as mixed climbing. MK Gully, West Face of the Remarkables Emilie and I were fresh off our respective ice and mixed climbing clinics and wanted to get stuck in. Kevin’s knee has still been bothering him since Headlong Peak, so it was just us two. The forecast was meant to be stunning and avalanche conditions were virtually non-existent. Our choice for the day was the M3 classic - MK Gully. We decided to skin up to Shadow Basin, stashing the ski kit and transitioning to climbing boots. Walking around the West Face and seeing the extreme drop-offs reminded me of why conditions need to be perfect back here. Any mistake would result in severe consequences. Emilie led out on pitch 1 - one of the cruxes of the route. It was a full body length step, which was awkward, but was made all the more difficult with spin drift pouring down in her face. Eventually, she got through it and brought me up. I led out on the second pitch which was just a steep snow climb and apologized at the lack of protection I placed when Emilie rejoined me. Swapping leads again, Emilie led out through another rock step until she set up a belay at an awesome ledge in the sun. It had been an epic day out so far, and we were frothing. I took over for the last pitch. I made a start up a snowy gully until getting to a rock step at the top out. One of my favorite things about mixed climbing is the art of using tools, hands, and crampons. At one moment, you hook a tool behind a rock. The right foot steps up. You leave the tool and place your hand on another rock. The crampon on the left foot finds a crack. Although I was in a no-fall zone, climbing at somewhere around my technical ability, I was in the zone. Fully immersed in the moment. This last crux had great protection, so I plugged a bunch of gear, mantled, and topped out. Topping out on MK Gully I left out a shout of satisfaction as I stepped into the afternoon sun. Finally on top, I built an anchor and brought Emilie up. We were absolutely buzzing and the only thing we could think about was doing another route! After a bite to eat, we walked back down to our gear and skied back to the car. I can see why this route is a classic. Happy days...
- Saturday Morning Special | Remarkables
Date: August 4, 2025 Location: The Remarkables, Queenstown, Otago, New Zealand Total Trip Distance: 4 mi / 6.4 km Total Elevation Gain: 1,735 ft / 529 m Trip Duration: 7 hours Team: Emilie Agnew Field Notes: The climb is 170 meters and completed in three to four pitches . Bring a full trad rack. We found the start to be the crux and the climb to be one step up in difficulty from MK Gully. Grade: M3+ Still buzzing off our climb of MK Gully the day before, Emilie and I went right back to the West Face for more. Our goal was to do something of equal or slightly greater difficulty. We landed on Saturday Morning Special, graded at 3+. My friend Henry warned me to take mixed grades with a grain of salt, so we went into it with an open mind. Saturday Morning Special taken from Queens Drive Standing at pitch 1, which was apparently the crux, it looked to be a decent step up. Being a stronger rock climber, Emilie started us off. It looked technical and awkward. I still wonder if we attacked the first pitch in the best way possible. Regardless, Emilie composed herself and made her way up. When I followed, I was glad I wasn’t leading. Emilie on the first pitch of Saturday Morning Special The second pitch definitely wasn’t as challenging as the first, but it didn’t let off the gas that much. I led out on moderate angled snow until another awkward body length step. I tried to find protection, but none of it was confidence-inspiring. I remember throwing in multiple pieces before committing to the move. Climbing the second pitch of Saturday Morning Special I had to shimmy myself up until I could get high enough where I could place a tool over the step. To my dismay, the snow was soft and deep, and I burned energy trying to get solid placements. Eventually, my tools secured a solid purchase, and I committed to the top out. Feeling vulnerable above the step, I was greeted to a fifty-degree-plus snow slope with massive exposure below. I climbed this six to seven-meter section, making sure every placement counted, until I reached the glorious safety of a belay cave. Emilie climbing above the awkward step on the second pitch of Saturday Morning Special I brought up Em, where we swapped, and she climbed a short section right before the top out. Because of the rope drag, she belayed me and let me take the final pitch in the sun. This climb felt harder than MK, and I relished the easy climbing with good protection all the way to the top. The afternoon sun was strong, and I practically belayed Emilie up in my base layers! We celebrated just as stoked as we had been the day before, buzzing off two back-to-back climbs on the West Face in perfect conditions. Ravished - we ate like dogs (or at least I did) and set off back to the car. Happy days...
- Number One Gully | Remarkables
Date: August 24, 2025 Location: The Remarkables, Queenstown, Otago, New Zealand Total Trip Distance: 3.5 mi / 5.6 km Total Elevation Gain: 1,580 ft / 482 m Trip Duration: 4 hours Team: Rob Fraser Field Notes: Climbed in two pitches. Pitch one is the obvious snow gully that heads up to a rocky area. The gully splits here. The second pitch climbs the left side - a slab/rock wall. Grade: M2 Number One Gully, Remarkables Route Topo Still buzzing off some good days on the West Face, I had the Enforcer at the Notch circled as one of the climbs I really wanted to try out. The weather looked perfect, and Rob and I set off early with high stoke. We walked along the West Face for over an hour trying to find the start of the route. I was convinced we had to be close, but nothing looked right. Rob wasn’t sure either, and after scratching our heads long enough, we called an audible. Plan B: Number One Gully. Number One Gully - Remarkables It was Rob’s first time mixed climbing, so an M2 felt like a solid introduction. The first pitch was mellow—just an easy snow gully. The second pitch was awkward - a steep slab covered in dry, unconsolidated snow made every move feel awkward. I had to dig and scrape off snow to find anything that resembled a placement, and more than once I felt like things were teetering on the edge of sketchy. Bit by bit we worked our way up until the snow finally gave way to sun, and we topped out with big grins. Not the Enforcer, but still a win—Rob got his first taste of mixed climbing, and I got more experience mixed climbing. Rob topping out on Number One Gully Happy days...
- Bowen Peak
Date: October 6, 2025 Location: Richardson Mountains, Queenstown, Otago, New Zealand Total Trip Distance: 9.95 mi / 16 km Total Elevation Gain : 5,313 ft / 1,619 m Trip Duration: 5 hrs 31 min Team: Solo Field Notes: A fun ski if there's enough snow. Hike up to Ben Lomond saddle and choose any convenient route to the summit. I wound up doing two laps. Grade: I, 1 Spring has been ruthless, there's no other way to put it. Storm after storm after storm has made it extremely difficult to do anything in the alpine. In fact, looking back as I write this, a good one month later, this is probably one of the best ski descents I've had of the whole season! I know it sounds crazy, but the best quality snow that I've skied the whole season, (besides arguably Headlong Peak ) has been this. Two cool Aussie dudes made for great chat on the way up I saw a brief gap in the storms, a sunny morning with light winds and thought to myself... wow, there's a chance that Bowen Peak could be corn... so I decided to follow my intuition and head up. From near Ben Lomond Saddle, I attached skins and climbed up the obvious southwest-facing ridge of Bowen Peak. As I climbed up, the snow was in amazing condition. The sun was out, I was in a t-shirt, and I was smiling from ear to ear. Today, I was genuinely going to be skiing corn. The summit of Bowen Peak I think I like skiing corn as much as I like skiing powder. There's something about the amazing sound that your skis make when in contact with the snow. The skiing is super stable and I find it to be immensely enjoyable. At the summit, a beautiful view of the Richardson Mountains opened up in front of me. I snapped a few photos, clicked in, and made creamy turns down the south-facing bowl of Bowen Peak. At the bottom, I let out a loud yell, so stoked to finally be skiing something in good condition! I decided to attach my skins and climb right back up for a second lap. Honestly, even just writing this makes me smile. It was such a simple day, but so much fun, and I caught a lot of second looks from tourists as I hiked back down the main trail. People asking me, is there supposed to be skiing up there?! Happy days...
- Glacier Peak & Douglas Peak Attempt
Date: November 2, 2025 Location: Tasman Glacier, Main Divide Range, Westland National Park, New Zealand Total Trip Distance: 5.63 mi / 9 km Total Elevation Gain : 2,910 ft / 887 m Trip Duration: 8 hr 49 min Team: Kevin Reid, Emilie Agnew, Louis Halpin, Ella Hartley Field Notes: Glacier Peak is a popular climb and ski from Pioneer Hut. The climb itself is straightforward, but later in the season crevasses will make this extremely problematic. The North East Ridge of Douglas has a thirty-meter ice/rock step. There is at least one abseil on the descent. Grade: Glacier West Face - III, 2+ | Douglas NE Ridge: III, 3+ For years, I had dreamed of flying up onto the glaciers around the Mt. Cook area. Huge, lofty, glaciated, snow-capped mountains — nothing makes me more excited. We had planned this trip months in advance, but with September and October proving impossible for mountaineering this year, I wasn’t optimistic about getting a weather window. But then, 10 days out… 7 days out… 5 days out… 3 days out… it became clear that a massive high-pressure system was moving into the country, aligning perfectly with our trip. Flying over the East Face Of Mount Cook When we showed up at Mt. Cook Village, there was a buzz I hadn’t felt in a long time. There was energy in the mountains. People were stoked and I was one of them. When we flew into Pioneer Hut, we found it completely alive — packed with climbers excited to make the most of the conditions. Pioneer sleeps 16, yet that first weekend, there were 25 people. Centennial was packed. Plateau Hut was reported to be full. One thing was for sure: if you love mountaineering, this was the time to be out. For our first mission, we decided Glacier Peak would be an awesome climb and ski. We woke up early — earlier than needed, to be honest — but because Emilie, Kevin, and I planned to attempt the Northeast Ridge of Douglas Peak as well. As we skinned under a combination of moonlight and head-torch glow, we looked up at Douglas, which looked incredibly imposing and coated in rime ice. We roped up for the ascent of Glacier Peak as there were many crevasses. However, conditions were excellent — everything filled in, firm, and solid. From the summit of Glacier Peak, we headed south along the airy and beautiful ridge toward Douglas. At the base of the crux, the group wasn’t feeling entirely optimistic. To be fair, conditions didn’t look good. The entire climb was covered in thick rime ice and looked completely unprotectable. I felt confident leading the first pitch, where I could see a way to back down if conditions weren’t right. Emilie and Kevin were okay with that, so I led out. The crux of the North East Ridge on Douglas Peak I climbed a small gully — something resembling a step on MK Gully in the Remarkables I’d climbed earlier this year. Above that, I continued climbing and began sidling right over steep, committing terrain. I hoped that around the corner would give me access the summit slopes. I checked my phone: we were just one contour level from the top — only about 20 meters. The sun was out, the sky was bluebird. We were truly in the alpine. This is what I live for. But as I came fully around the corner, I was dismayed to find the climbing looked just as hard, with another ice step and more rime ice making everything unprotectable. I sat there for five minutes, calming my breathing and searching for alternatives, but the reality was clear. The climb wasn’t in condition. It was time to go down. I backtracked and downclimbed to where I could loop some cord around a rock, then got lowered back down to Emilie and Kevin. I think we all breathed a sigh of relief. From here, we belayed each other down a steep snow pitch until we were back on firmer ground. We walked back to Glacier Peak, where we ran into a group of seven other highly stoked mountaineers sharing Pioneer Hut with us. They applauded our effort on Douglas — and to be fair, when we looked back, it did look extremely imposing. We weren’t out of the woods yet, as the west face of Glacier Peak was very firm and icy. We made delicate turns down the face. One of the guys I met on the trip, Neil — an ex-pro skier and all-around legend — was incredibly stoked for us, and we snapped an awesome team photo at the base of the ski. Glacier Peak, West Face Smiles on our faces, made our way back to Pioneer Hut to refuel. It was an awesome day. We had one hell of an effort on Douglas — and we skied off a 3000er. Happy days...
- Lendenfeld Peak
Date: November 3, 2025 Location: Fox Glacier, Main Divide Range, Westland National Park, New Zealand Total Trip Distance: 7.82 mi / 12.58 km Total Elevation Gain : 3,327 ft / 1,014 m Trip Duration: 9 hr 27 min Team: Kevin Reid, Emilie Agnew, Louis Halpin, Ella Hartley, Patrick Hartley Field Notes: A straightforward climb from Marcel Col. I think the biggest issue would be navigating the crevasses on the Heemskerck Glacier in the dark. The upper pitch on Lendenfeld doesn't get steeper than forty degrees, but we did find hard ice at times. Grade: III, 2 Buzzing off a fantastic climb and ski of Glacier Peak — and a so-close attempt on the summit of Douglas — we were keen for more of the high stuff. We had our eyes set on climbing Mt. Tasman. Realistically, that wasn't going to happen with six people. But we knew Lendenfeld would make a fantastic summit and another three-thousand-meter peak. The group decided on a 2 a.m. departure from the hut, which pretty much solidified in my mind that Tasman was not a realistic objective for the day. Still, I was super happy to climb Lendenfeld and get some valuable beta for a future attempt at Tasman. Mount Tasman and Lendenfeld Peak from Marcel Col We skinned off into the night again, headlamps cutting through the dark, though at times I left mine off because of the full moon. There’s something magical about skinning across the glaciers under towering, snow-capped peaks, illuminated by moonlight. There was some debate about how to navigate the crevasses since we weren’t sure of the exact route in the dark. Patrick had been through the area just yesterday but couldn’t remember the line he’d taken. I opted for the left-hand side; the group leaned toward the far right. In the end, we took the right-hand option, which proved to be the right call. We were able to skirt around the crevasses and use ski crampons to make travel as efficiently as possible. We finally got into a groove and got closer to Marcel Col. The contour lines on the map don’t properly show how steep the lower part of the Heemskerk Glacier actually is. Not steep enough for crampons and ice tools — but steep enough that ski crampons were definitely needed. Near the top of Marcel Col, the slope steepened again, becoming extremely icy with chicken heads everywhere. We had a few issues with ski crampons and dropping gear, but eventually everyone made it safely to the top of the col. After a quick break and a bit of reorganizing, we headed up the east ridge of Lendenfeld — just in time for one of the most spectacular sunrises I’ve ever seen. Climbing next to Kevin, the alpenglow lit up the entire range. It was such a special moment that I kept stopping to take photos of him as he climbed. Kevin in hero light and hero conditions on Lendenfeld's East Ridge It was quick work from the col to the summit, and we enjoyed an unbelievably calm morning with bluebird skies and warm sunshine. We ended up hanging out on the summit for a couple of hours — eating, relaxing, soaking it all in. I couldn’t help staring over at the North Shoulder of Tasman, which looked to be in absolutely incredible condition. Some days you hold 'em, some days you fold 'em. It was awesome hanging out with the whole crew — Kevin, Emilie, Patrick, Ella, and Louis. Everyone was buzzing atop the peak. Ultimately, like all trips, we began our descent. We down-climbed back to Marcel Col, clicked into skis, and made a somewhat icy but fun descent down the glacier. At ten in the morning, we bypassed a Japanese couple on the lower part of the glacier. They had a long way to go, up and down, in the blazing sun. It was no surprise that I saw the Japanese climber the next day with duct tape all over his face. He spent some time in the oven. Regardless... Happy days...
- Mount Humdinger Attempt
Date: November 4, 2025 Location: Fox Glacier, Main Divide Range, Westland National Park, New Zealand Total Trip Distance: 4.2 mi / 6.8 km Total Elevation Gain : 1,435 ft / 437 m Trip Duration: 6 hr 27 min Team: Kevin Reid, Emilie Agnew Field Notes: The North East Face is potentially steeper and harder than other similarly graded routes out there. Bring two tools, snow pickets, some ice screws, and a light trad rack. We encountered alpine ice on the route and bailed very close to the top under rapidly warming conditions. Grade: II, 2+ After our climb of Lendenfeld Peak, the freezing level shot up. Ella, Louis, and Patrick were keen to ski over to Centennial Hut. This left Emilie, Kevin, and me with a day to climb something. The only problem was figuring out what. Many routes were either out of condition or plastered in rime ice. Kevin and Emilie came up with a great idea: climb a route on Humdinger. Originally, we thought about the Couloir Route next to the North Rib, but instead opted for something that felt a touch more manageable — the Northeast Face. The Northeast face of Mount Humdinger We set off relatively early and reached the base of the climb right around sunrise. We brought a few screws, a light trad rack, and snow pickets. As we approached, the line looked pretty damn steep. To gain the Northeast Face, you start by climbing a steep headwall — arguably the steepest part of the day. We all soloed it and it was good practice. Although most people tend to overestimate slope angles (myself included), this one genuinely sat somewhere in the 55+ degree range; by the top our bodies felt close to vertical. And no, I'm not exaggerating! We topped out on the headwall and began the main climb. It was already warm, and expectations were naturally starting to shift. The day was cloudy and socked in, giving everything a soft, muted feel. As we continued, we immediately ran into sections of low-grade alpine ice. The climbing was easy enough — maybe 40 degrees — but a fall unroped would have been disastrous. At the top of the first pitch, Kevin placed a couple of screws and built an anchor. Once we clipped in, it was unanimous: it was time to go down. We were close to the top, but conditions were too warm. No regrets, no second-guessing. Kevin belaying Emilie down the face The face was icy, with rime formations looming above us, and everything was warming quickly. Climbing a solar aspect early in the morning while everything is already heating up — with ice overhead — is not a great recipe. The call was easy. We belayed each other down, practicing rope techniques and careful down climbing, and made our way off the mountain safely. We timed it perfectly. Near the bottom, small bits of ice were already beginning to come down from above. Looking down The Northeast face of Mount Humdinger I think this trip was one of the most valuable experiences of the entire trip. We made good decisions together. Everyone kept a cool head. And most importantly, we all walked back into the hut feeling upbeat and proud of how we managed the day. It was a fun climb — short, thoughtful, and memorable. I’d love to return for another go at the Northeast Face or even the Couloir Route when conditions are better. Happy days...
- Grand Couloir, Remarkables
Date: November 12, 2025 Location: The Remarkables, Queenstown, Otago, New Zealand Total Trip Distance: 4.14 mi / 6.7 km Total Elevation Gain: 2,234 ft / 681 m Trip Duration: 2 hr 38 min Team: Solo Field Notes: The Grand Couloir is the obvious snow-filled couloir that splits Double Cone and Single Cone. The average slope angle is somewhere around 30 degrees, with one short section hovering around 40 degrees depending on snow conditions. Avalanche and rockfall prone. Grade: I, 1+ Coming off of a fantastic trip from Pioneer and Centennial Hut, the weather was still beautiful and I wanted to take advantage of as much sunshine as possible. I had a light day of work on Wednesday and figured a good idea was to ski the Grand Couloir - a route I've only climbed but not skied. The Grand Couloir from a frozen Lake Alta My original intention was to be up early with a high freezing level, but when I woke up at 5 a.m., I put my head back down on the pillow and fell asleep for another hour and forty-five minutes. I woke up thinking I was probably going to be too late as everything would be too warm, but I decided to head up anyway and have a look. Skinning up to Lake Alta, I was blown away to see how much snow is still present. Lake Alta was completely frozen. As I got to the base of the climb, my concern of the snow being too warm was reversed. I realized I was probably going to be several hours too early. I slowly and methodically cramponed up the couloir, hoping it would magically thaw out. Although the sun was shining, there was a hazy high cloud that was blocking the sun from having its full effect and I knew I would be most likely skiing ice, a repeated theme from the last few weeks. At the top of the line, I wasted no time as this line wasn't going to thaw out anytime soon. I did a combination of jump turning and side slipping through the steep bit, and eventually linked turns when the terrain mellowed out. Next time, I think I'll have a go on the Petit Couloir, which looks a little bit more exciting. Either way, it was a fun day out, and glad to take advantage of some late-season turns. Happy days...
- Somnus Couloir
Date: Nov. 16, 2024 Location: Humboldt Mountains, Mount Aspiring National Park, Glenorchy, Otago, New Zealand Total Trip Distance: 19.8 mi / 32 km Total Elevation Gain : 5,979 ft / 1,822 m Trip Duration: 14 hrs Team: Rob Fraser Field Notes: A mega classic. Access is up the North Routeburn. There is an excellent bivy rock at the base of the line - Hobbs Bivy. The couloir itself is roughly 900 meters. Some people may wish to head to the summit from the top of the line, which is an additional 300 meters. Although no steeper than 40 degrees, the couloir is very prone to avalanches, icefall, and rockfall. Bergschrunds form in spring. It is also very common to find wind slab at the top of the line. Grade: I, 2 The Somnus Couloir is an incredible line. When one sees it, one knows. I tried to climb it two years ago and got a couple hundred meters from the top before turning around. Too warm, too many schrunds, too much risk — I bailed. I remember walking back down a bit disappointed when all of a sudden a massive piece of ice fell off the walls behind me and thundered into the couloir, maybe 50 meters behind me. This is a line that, although not that steep, comes with big consequence. And I knew I’d be stoked to get to the top of it one day. Somnus Couloir, North Routeburn Fast forward to 2024, and a trip out there never happened. Maybe I was unmotivated — I’m not sure. But 2024 wasn’t the year. In 2025, I was definitely motivated to ski the line. Winter didn’t really deliver the conditions I’d hoped for, and then September and October were nonstop storms. I remember texting my buddy Paul, who also wanted to ski the line, telling him, I just don’t think this is the year for Somnus. After coming back from my Mount Cook trip, I figured there wouldn’t be much time left for skiing. I was very wrong. A friend sent me a message showing current conditions on the couloir, proving it was still in. I hit up Rob to see if he wanted to ski it. We had talked about it multiple times and even viewed the line earlier in winter from the summit of Xenicus. As a bit of extra motivation, I said, if you don’t want to ski this line, I’m going to take your firstborn child. Unsure whether he was motivated by excitement to ski a mega classic or fear of losing his firstborn, he said yes . Rob climbing Somnus Couloir in the early morning hours The next question: alpine-style in a day or an overnighter? On my previous trip I’d stayed at Hobbs Bivy — a perfect base at the bottom of the line. But the reality is: carrying heavy packs sucks. Carrying a heavy pack with skis and boots on your back sucks even more. So we opted for light and fast — done in a day. I picked Rob up at 10:30 p.m. on Saturday and we drove to the Routeburn Shelter. We pulled in and started walking up the trail at 12:15 a.m. On the drive, Rob and I talked a lot about expectations, which I think is one of the healthiest things partners can do before going into consequential terrain. Rob is one of my all-time favorite partners. His mindset is switched on. We don’t agree on everything — which has now sadly become a negative in modern society — but what I want to point out is the quality of these conversations when we do have different points of view. When we talk through decisions, we express how we feel in a place of non-judgment, listening, and sharing perspectives. Even when we both agree, we still pick it apart to make sure we are not both blind. I can't think of a single time any discussion turned emotional, which is critical in these environments. Rob is also very fit, which comes from an ultra-running and ski background. He is also very switched on with snow science, and I'll often find myself picking his brain. As we expressed our concerns and views about the day, we settled on two words as our mindset for the climb: pessimistic and skeptical. Pessimistic because we'd just received 30 cm of new snow on Friday. We were pessimistic that the line would be safe. We knew we’d encounter wind slab somewhere over 900 meters of terrain. Skeptical because there were many unknowns. Skeptical of the weather — is it cold enough? Skeptical of the wind — is it transporting snow? Skeptical of the snowpack — is this safe enough to ski? If anything felt off, we’d bail. From the trailhead to reach the snowline at the couloir took us about five hours. Halfway up Somnus Couloir at sunrise Although I was pessimistic we’d be skiing the line, my confidence rose slightly. The sky was clear, stars shining, and it was cold. The day prior I’d also watched the Harris Saddle webcam and saw the snow go through a consolidation cycle. We put on crampons and started booting up. A few things stood out: old avalanche debris (expected, but never comforting), and ugly snow for the first hundred meters — nothing skiable. But another positive: the snow was frozen hard and firm. We continued upward. I felt energized and we moved quickly. Any time either of us noticed a change in the snow, we stopped and talked about it. The couloir isn’t that steep — maybe 40 degrees max — and it’s wide enough to make actual turns. However, the consequences are huge. It’s the perfect angle for avalanches. It’s south-facing and holds instabilities longer. It’s 900 meters long, so the variability is enormous. There’s rockfall, icefall, and debris everywhere. The top walls of the couloir get more sunlight than people realize. And as I wrote above, two years ago a chunk of ice fell 50 meters behind me — something that would have had serious implications had it hit me. Rob nearing the top of Somnus Couloir About two-thirds of the way up, we hit a massive schrund. On both sides, though, there appeared to be a passage. We spent about 10 minutes probing with a ski pole and inspecting. If the bridge collapsed, the outcome would be very bad. We seriously debated turning around here. Eventually, I climbed the left-hand side, was satisfied with the snow, and climbed above it. Rob followed. We knew it was an added risk — one we’d have to ski above later. We continued the long grind upward. Near the top — maybe 30 meters below — we encountered wind slab. After multiple hand shears and assessments, we weren’t thrilled about it but felt reassured that it was unreactive and not propagating. Still, another added risk. Finally, at the top of the line, we looked toward the summit. Originally, we planned to tag it as a bonus. But seeing snow actively being transported onto the summit slopes — slopes now being hit by the morning sun — made the decision easy. That would be risk number three. We passed. The wind at the top was strong. We layered up, organized gear, and clicked in. Rob skied the first pitch to the safe zone we’d identified on the climb. After hearing safe , I met him there. The next section was where the money was made. I watched Rob drop in. His first turn sent a plume of cold smoke into the air. Two turns, three turns — he was hooting and hollering. This is what it's all about. I dropped in next, skied into the guts of the couloir, and linked turns through boot-deep, stable pow. I literally couldn’t contain myself. We regrouped, buzzing — skiing Somnus in stable boot-deep pow. Unreal. From there, we skied conservatively, knowing the schrund was below. Near the lip, we chose skier’s right, where we could make one quick turn over the snow bridge to safety. Rob went first, then me. After that, we leapfrogged down the couloir, mostly doing jump turns due to the variable snow. 100 meters above the end of the snow, we transitioned back to crampons and walked the final section over the rutted terrain back to our boots. Finally back at safety, we did your classic bro hug. A truly special moment. This line is a mega classic — and we fucking nailed it. Not only did we nail it, we nailed it as a team: efficient, great judgment, and tons of fun. For me, efficiency is one of the biggest draws in the mountains. I love the feeling of climbing quickly and smoothly and waking up the next morning still stoked. We made the obligatory stop at Mrs. Woolly’s for coffee and food, sitting there bleary-eyed and talking about buying one of the wool blankets. After Mrs. Woolly’s, we jumped in the lake for a cold plunge — a ritual after mountain missions. The cold zapped any remaining energy, and as soon as I got back behind the wheel my eyes crossed and Rob had to finish the drive. That night I slept for 13 hours straight. I feel super grateful we were able to ski this line — safely and in good conditions. Happy days... Rob skiing Somnus Couloir
- Somnus Couloir Attempt
Date: Nov. 30 - Dec. 1, 2023 Location: Humboldt Mountains, Mount Aspiring National Park, Glenorchy, Otago, New Zealand Total Trip Distance: 21.22 mi / 34.15 km Total Elevation Gain : 4,871 ft / 1,484 m Trip Duration: 2 Days Team: Solo Field Notes: Poor snow and route conditions turned me around 450 meters from the summit. The Somnus Couloir is best climbed in September to early November with stable snow conditions. I was a few weeks too late. The couloir is never that steep but has much objective hazard (described below). Easy access can be had by staying at Hobbs Bivy, a 3.5 hour walk from the Routeburn Shelter. Rating: I, 2 Download GPX File * Click here for a successful ski descent of Somnus Couloir It's crazy to think that less than a week ago I was climbing Mount Barth. It almost felt too quick to pack up the bags again for another mission, but when the weather is good here in New Zealand you have to go for it. My plan was to climb Somnus via the Somnus Couloir; an 800 meter chute in the heart of the North Routeburn. The mighty Somnus Couloir The day before leaving I got a text from a new potential climbing partner, Henry, about doing the southwest face of Brewster - another dream climb. I've been wanting to do a mission with Henry because he has a ton of experience (way more than me) and seems like a good dude. Unfortunately when I woke up the next morning he was unable to get work off, so I switched back to my original plan of climbing Somnus. I made the two and a half hour drive to Glenorchy, shouldered my pack and started down the trail. Within five minutes I ran into my old friend Tsukasa. I blurted out "oh my God! Tsukasa!" He looked like he saw a ghost. Only 48 hours ago we were sharing a beer together to catch up as we hadn't seen each other in nine years. Now twice in two days. A great start to the trip. The Routeburn track is quite famous and for obvious reasons, it is simply stunning. The forests are almost spiritual. Not even almost, they are spiritual. I arrived at Routeburn Flats not feeling entirely optimistic. It was really, really warm and when I looked up high I couldn't see any snow. At this moment I thought about diverting my plans to climb Xenicus but decided this was my only chance in the season to climb Somnus. Routeburn Flats Hut I spoke to the hut warden to see if she knew anything about conditions and she told me that a party had successfully climbed the peak one week ago, but since then it had gotten really hot. She also said she climbed Xenicus today and that it looked like a bergschrund had opened up in the middle of couloir, but she couldn't be 100% sure. I sat at the creek and weighed my options. Ultimately, I had to take a look. When I reached Hobbs Bivy I was greeted by one thousand bugs. I was really glad I chose to wear long clothing! I collected some firewood and got a nice fire going - always a treat in the mountains. I went down to the river to soak my feet and have a look at the route. At first impression it didn't look great. I could see three different places where a bergschrund had opened up. Cloud had funneled into the couloir making it difficult to appropriately assess conditions. Ultimately, the only way to truly know something is to experience it. I headed back up to camp and went to sleep. I woke up at 2 am, packed my stuff, made a coffee, and got underway. It was warm. Another red flag. At this point I felt that the odds of the route being in condition were slim. I climbed up into the couloir and felt the snow. It was soaked. Isothermic. Damn. I kept climbed climbing because I wanted to see if the snow became firmer with elevation. I wasn't concerned about getting avalanched at this point, I was concerned about the icy walls that lay about the couloir. I made good time and kept climbing higher when I reached my first obstacle - a bergschrund lay in front of me that required a climbing move (except it was soft snow and not ice). It was a 4 foot vertical step and the crack below would likely be fatal if I fell into it. I felt fine, made the move and climbed on. Higher I reached a second schrund. This was actually sketchier because I had to trust a snow bridge that I had almost no trust in. This was a deep fucking hole. I worked my way across the snow bridge and climbed higher. At this point I stopped and had to have a conversation with myself. The first schrund was not too bad and the risk of falling into the hole was extremely, extremely low because of the way it was angled. The second shrund I relied on fate, luck, or chance. Without a partner and without a rope and with overly warm conditions it was an extremely risky move. I told myself that if I got to a third major obstacle I would turn around. Ten minutes later I reached the third and final schrund that I spied from the valley yesterday. It required crossing another snow bridge. It was a no brainer and I made a deal with myself already. The risk was too much at this point and I turned around. Intuitively, it never felt right anyways. I know that I could've crossed that third schrund, bagged the summit, and got back to the car in one piece...but at what cost? The thing is, when you start taking big risks in the mountains and you get away with it, it fucks you. It fucks you because if you do that enough you will think it's skill. When I looked into the shrund and saw a bottomless pit, I can not think of a worse way to die or get severely injured. No thanks! As I was near the bottom of the couloir I head a gunshot above me. I actually almost tripped at the sound it was so loud. I turned around and saw a massive ice fall smash into the couloir near where I was climbing just twenty minutes ago. Wow. Bailing on Somnus, Mount Erebus above It felt really nice to be in the valley again out of harms way. I was proud of myself for making the safe decision to turn around. Timing in the mountains is everything and this time the timing was not right. I was a bit gutted to see the summit of Somnus soaring above the clouds though...oh what a lofty summit it is! As I walked out of the North Routeburn an elderly lady came around the corner. "SOMNUS!!!" she squawked. She painted a huge smile on my face. I shared the story of my adventure, the bergschrunds, the shitty snow, and my philosophies on life and death. She said she had a camera and was trying to get a shot of me summiting the peak as the ranger told her I was out here. Oh what a world we live in! She had a captivating energy about her and listened with great interest. Come to find out, she had used to be the hut warden many moons ago in the Routeburn. "Oh well, it'll be here next time," she said. "Come on, go get your coffee in Glenorchy!" So I went and got a coffee in Glenorchy :) Happy days... Stunning Somnus, North Branch of the Routeburn
- Fog Peak
Date: October 14, 2024 Location: Harris Mountains, West Matukituki, Otago, New Zealand Total Trip Distance: 9.39 mi / 15.11 km Total Elevation Gain: 6,364 ft / 1,940 m Trip Duration: 9 hours 40 mins Team: Solo Field Notes: Start at Raspberry Flat car park and walk to the spur between Raspberry Creek and Wishbone Creek. Climbing directly up the spur following a sheep's trail until a flat spot at 1,020 meters. Cross a creek and head east through scrub joining the ridge at 1,380 meters. Take the spur directly out of Wishbone Creek on the true left and head towards Pt 2015. Begin to sidle into the basin below Fog Peak at roughly 1800 meters. Join the West Ridge at any convenient point and head directly to the summit. Grade: I, 2 GPX Fog Peak, West Ridge Route Topo After a long period of inactivity in the hills, the climber only wants only one thing: good weather . Good weather seems to solve almost every problem. Depression, sadness, laziness, sickness, you name it! Things come alive in good weather. What good weather also brings is a healthy dose of indecision. The last eight weeks have been simply torturous and my ever increasing list of trips easily doubled. Now the weather was good - what to do? Fog Peak. The West Ridge is the left skyline ridge. I was in conversation with a few people for different trips, but ultimately my loyalties lay in the magical West Matukituki valley. Also, I couldn’t wait. People were talking about trips later in the week and I wanted to go now because God only knows how quick the forecast can change. It was five in the morning when I stepped outside my blue Nissan Caravan onto the gravel parking lot at Raspberry Flat. It was good to be home. Cloud sat somewhere around 1300 meters in the valley and I second guessed the “fine with some clouds” forecast. A fruit smoothie was consumed and I got underway. After scouting the route with binoculars the day before, I took the spur directly between Raspberry Creek and Wishbone Creek. Fast travel was had following the obvious sheep trail that took me to a flat spot at 1,020 meters to cross a creek. Once I skipped across the stones, I headed up and to the east to meet the ridge on the true left of Wishbone Creek at 1,380 meters. Don’t climb above this point as the spur bluffs out and you will need to down climb. Fog Peak and Wishbone Creek center image. I took the spur to the climber's right. I crossed avalanche debris and took the middle ridge that splits the two gully’s, heading up towards point 2015. The snow was hard and the grade steep, so I switched from ski crampons to actual crampons and ice axe. The sun had finally began to touch these northwesterly aspects and everything about me smiled being in the sun. I climbed higher until 1800 meters where I began to sidle east towards Fog Peak. Conditions were stunning and allowed for fast travel. The lower elevations of the valley were a beautiful spring green while the middle and upper elevation bands glistened white. I have never seen Rob Roy Peak look so beautiful. My favorite mountain. From L to R: Edward, Maoriri, Maruiwi, Maiti-iti, Maori, Wahine, Govenor's Ridge, Glengyle, Rob Roy, Avalanche One hundred and fifty meters below the summit I gained the West ridge. The day had been a slog, carrying skis on my back most of the way. My heart was pounding and I had to stop every few minutes for a breath. I looked around. In all directions were an ocean of peaks. Here I was, alone, atop a lofty ridge with my heart ferociously pumping blood to my body to continue the ascent. The wind was non existent and the sun worked its magic on the snow, softening it just the necessary amount for my skis to do their job. I smiled that smile where, you’ve done a magical thing and only you know how special it really is. A few minutes later I stood on the summit. Looking down the West Ridge from the summit of Fog Peak The descent off Fog Peak provided variable skiing up top, and excellent corn skiing on the lower ridges back down to Wishbone Creek. I stepped out of my ski boots and enjoyed a long break in the sun. Truly, this is what I live for. I took a moment to pray and thank God, life, the people apart of it for making this opportunity happen. Sheer gratitude and love for life. Skiing the West Ridge of Fog Peak Unfortunately, that gratitude wore off once I started smashing and falling down the steep tussock slopes! How just one moment ago I was all spiritual and thirty minutes later I was cursing the high heavens! Only the mountains can do this to the soul… At the valley bottom, almost ten hours later, the gratitude had seeped back into my core and I finally could stop for the day. I had timed it perfectly and now it was time to refuel and take a cold bath. Under a scorching afternoon sun, I watched a small avalanche release from Craigroyston Peak. The day had come to an end. Happy days... Looking into the East Matukituki Valley from Fog Peak
- The Doolans
Date: Multiple trips - Winter & Spring 2024 Location: Doolans Creek, The Remarkables, Queenstown, Otago, New Zealand Trip Duration: Anything from short tours to multi-day trips Field Notes: Either skin or take the Curvey Basin Chairlift to a steep head wall which gives access the predominantly East to South facing terrain known as the Doolans. Other alternate entry points are Wye Saddle or the head wall south of Point 2057. The area mainly consists of short, moderate angled runs and bowls but does have some steeper options available. The area is easily accessed which makes for either short or longer tours. This zone is highly susceptible to wind loading. The Doolans Backcountry Ski Map. Common ascent (purple) and descent (blue) options. Great skiing off Point 2035 Looking West from the basins near Point 1771 at the head of Doolans Creek Right Branch This area can get the brunt of the wind. Notice the cornice above. More information to come here as I spend more time in the Doolans... Happy days!
- Crown Range Traverse
Date: September 29, 2024 Location: Crown Range, Arrow Junction, Otago, New Zealand Total Trip Distance: 10.66 mi / 17.15 km Total Elevation Gain : 5,732 ft / 1,747 m Trip Duration: 7 hour 37 min Team: Emilie Agnew, Kevin Reid Field Notes: From Crown Range Pass head in a northerly direction up and over Mount Scott, following the broad ridge to Mount Sale. Fun skiing east leads to a saddle between points 1617 and 1327. Losing some elevation, head north to gain Point 1308. From here continue north following the bumpy ridge to Cadrona. In all but the deepest of conditions some walking will be required. The route is often skied in the opposite direction. GPX Crown Range Traverse Route Topo Kevin and Emilie near the summit of Mount Sale Spring has tested my patience so far this year. I had visions of some cold, clear high pressure systems with a stable snowpack to climb and ski in the big mountains. Instead, it's been dumping snow and the avalanche hazard has been quite dangerous. As I write this, two people have been buried in the last week and one person dead. With a beautiful weekend approaching the Southern Alps, the first in awhile, I was wracking my brain about what could work. Eventually, one has to question themselves if they need to think that hard about "what could be safe?" The reality is, it's dangerous out there in the high peaks. I don't know anyone who has climbed anything big or been up high. There's a saying I once heard - "the best climber is the one who knows when to stay home." I have observed myself becoming extremely impatient this week and realized that it is not the time to go high. Thankfully I was able to have some open and honest conversations with my friend and climbing partner, Henry Frakes, whom I continue to learn from in more way than one. So, what to do with a dangerous snowpack and beautiful weather? Find low angle terrain without overhead hazard. I was in conversation with two people whom I had met at a crevasse rescue training - Emilie and Kevin. I pitched the idea to them and gratefully they were keen. We started the day at the top of Crown Range Pass to the surprise of a few Asian tourists who were wondering if this was the ski field. One of my favorite moments of the day was watching a small Japanese child stare in wonder as I packed my gear while I chatted to the father. Was that moment planting the seed deep in the child's subconscious mind that will germinate into the next generation of backcountry skiers? Trail runners on, we climbed up Mount Scott until we hit the snowline at 1200 meters. The day was beautiful as we stood atop our first summit of the day, wasting no time and continuing on towards Crown Peak. We hopped a fence or two, skidded, took skis off, put skis back on and eventually hit great touring conditions as we neared the summit plateau of Crown Peak. The wind had decided to blow so we decided to keep moving. I remember my last time up here and know how immobilizing the wind can be if it gets into your bones. Skinning towards the summit of Mount Sale Blue sky against white snow provides a surreal experience in the mountains. We were three black figures moving across the landscape. The snow had softened considerably and we were excited to ski the eastern aspects off Mount Sale. At the summit, we transitioned to ski mode and enjoyed perfect corn conditions into the basin near Point 1327. It was so much fun we decided to skin up near Point 1617 and enjoy one long run all the way down to our transition point. The stoke was high as we regrouped at the bottom and everyone was beaming. I had low expectations of the snow conditions today and was happily proven wrong. We enjoyed a bite to eat and continued on to Point 1308, heading north from here. The remainder of the day was a bit of slog. We spent a ton of time with skis off, walking in ski boots, our toes enduring solid punishment. The southern aspects provided snow, the northern aspects provided tussock. It wasn't an easy day by any means and I want to acknowledge that Kevin and Emilie were fantastic companions. Fit, great energy, good vibes. Good mountain partners... seek and ye shall find. As we climbed the final 100 meters to greet the Cadrona Mountain road, we were way past schedule. No one was going to be up there at five in the evening. In my gut, which I trust more than anything, I could feel that (as my best bro Alex says) everything is always fine. I climbed up over the last slope, looked up the road and saw a truck ripping down the mountain. Holy shit! I blasted down the mountains with skins on. I ate shit. Kevin flew down after me. He ate shit. I got down to the road and flagged down the truck like someone was dead. Desperation in my voice, "can you please give us a ride?!" We only have room for one . "Dude, please...we can sit in the ute." They chatted among themselves. Alright, let's go. Then Emilie comes over the slope. Incredibly, she didn't eat shit. Riding down that mountain road as the sun set over the Otago Southern Alps was one of the sweetest feelings I've had in so long. Like finding a swimming hole after a stinking hot walk down from a mountain slope. As I walked along the ridge tops that day, I kept looking out at all of the mountains there are to explore in this country and the limitless potential they provide for all of the mountain disciplines. I am indeed grateful to spend my days here. Happy days...
- Mount Pisa & Kirtle Burn Hut
Date: October 5 - 6, 2024 Location: Pisa Range, Cadrona, Otago, New Zealand Total Trip Distance: 16.53 mi / 26.6 km Total Elevation Gain : 4,436 ft / 1,352 m Trip Duration: 2 days Team: Solo Field Notes: The Pisa's might be the most beginner friendly backcountry ski destination I've ever been to. With avalanche danger still high, it was a perfect place for low consequence runs and to spend a night out. Kirtle Burn Hut is a basic hut that is easily reached from Snow Farm in two to three hours and provides great ski touring access. GPX Kirtle Burn Hut & Mount Pisa Ski Tour Route Topo I have been going stir crazy. My friend Alex called me today to see if I had "jumped off a cliff yet." Another climber emailed me saying "I'm going a bit nuts." The weather has been terrible for getting into the alpine. As I write this, the wind is blowing a gale and avalanche danger is considerable. The weather windows we do get are short lived and the snowpack doesn't have time to heal, making for dangerous conditions. I watch the weather forecasts obsessively, probably to a detriment, and knew that I had to do something over the two sunny days we had over the weekend. Northwest towards Dome Rock from Mount Pisa I decided the best option was to head into the Pisa Range. Combined with the fact that there this is a hut I could spend a night in, the terrain is of low consequence, and I have never been there before made it appealing. An hour and change and I was at the top of Snow Farm ready to go. Touring right from the car park - how good? It took two and a half hours to reach Kirtle Burn Hut. I wondered if anyone would be there and to my surprise it seemed there was - all the windows were open. As I got closer to the hut I realized no one was actually there...everything had been left open before the last three day storm. I rounded the corner and got eyes on the front door - it was not a nice sight. Snow had filled about a third of the hut. I got to work and spent the next hour shoveling out snow and mopping up the floors with whatever tools were available. Luckily two Wanaka locals stopped by to help out and the job was done faster than I could do alone. With the sun beaming I left all the windows and doors open to dry out the hut and went exploring. For the first day I decided to skin up to Mount Pisa and ski the western aspects into Cliff Burn. The sky was cobalt blue and a light breeze kept me from wearing just my base layer. The snow was soft and allowed for great spring turns into the basin below. I watched as the kite skiers got lap after lap. Satisfied with my day I headed back to the hut. From the afternoon onward I spent the day enjoying hot drinks, reading, lounging in the sun, tidying up the hut, and absorbing the quiet of the Pisa's. There was a silence that would not be possible to put into words. Like all good trips in the hills, tension submits. Shoulders relax, the jaw releases, the corners of one's mouth automatically go into a slight smile, and eyes become glossy as if one had used a substance. I slept deeply underneath a star filled sky. In the morning I waited patiently in my down filled bag for the first rays of sun to hit the east facing windows. With its arrival I brewed tea and stepped outside. The morning was perfect. The sky a shade of blue that is only possible at the early hour and a pair of Pied Oystercatcher's looked for food in the snow. At ten I witnessed the thawing of snow and began my tour south to Column Rocks. Near the top I ran into another two locals with the man talking so rapidly I walked away wondering what we even spoke about. I decided to ski a northeasterly aspect into the head of Prince Burn which provided some fun morning turns. From there I headed up onto the flat ridge above the Burn where I eventually got one last run, back again, into Prince Burn. I crossed the creek a few times over until eventually meeting the Snow Farm Trail along Roaring Meg. The sun was hot now and I was glad to be back to my home, my beautiful blue van, where I unpacked and headed back to Queenstown. Happy days...
- Mount Ferguson & Lapith Peak
Date: November 11-12, 2024 Location: Richardson Mountains, Rees Valley Station, Otago, New Zealand Total Trip Distance: 19.51 mi / 31.39 km Total Elevation Gain: 8,655 ft / 2,638 m Trip Duration: 2 days Team: Solo Field Notes: For access into Arthur's Creek, see the detailed description below. Ferguson and Lapith Peak make for great skiing with close to 1,000 meters of skiable terrain. There are some exceptional steep couloirs on the south face of Long Charlie Spur. Permission must be sought from Rees Valley Station: 03 442 9908 Grade: I, 2 Download GPX File Google Maps Location Arthur's Creek Route Topo Spring has finally blossomed and the mountains are delivering. I had considered a variety of different trips for this window and ultimately chose to head into the Richardson Mountains as they will lose snow first before the other ranges. I gave a quick call to the Rees Valley Station to ask for permission and in turn, they gave me some excellent beta to avoid terrible scrub. The Forbes Mountain Range I started mid afternoon under a hot sun. Thankfully the wind was up and it kept me from breaking into a full blown sweat. The route into Arthur's Creek is straightforward but can quickly turn into a shit show. To avoid this, cross Arthur's Creek and look for a clear defined sheep's trail that heads directly uphill. Continue following the sheep's trail until you hit an old fence line. Follow this fence until you find a white pole road marker where there is an obvious gap in the fence. Go through this and again follow a rough sheep's trail through scrub until the ridge is gained at 900 meters. From here, it is easy to follow the ridge line into the head of Arthur's Creek. Once in the mouth of the valley, follow the obvious trail down into the creek and cross over to the true left. Head uphill, gaining roughly sixty to eighty meters in elevation before dropping back down to the creek at 1,260 meters. This route will help you avoid some painfully slow terrain. At the flats, cross over and follow the true right of Arthur's Creek up the valley. There is no easy path forward from here and travel is slow. Mount Ferguson and Lapith Peak route topo I set my alarm for six in the morning, unsure of how good the freeze would be overnight. Part of me felt like I wouldn't be skiing corn until early afternoon, but I didn't want to risk it. At five thirty in the morning I felt like someone was pushing me awake. And no, I'm not kidding. There are things that happen in the mountains that are supernatural. I fired up my Jetboil to brew some hot water and warm the body. By 6:30 I was off. The temperature was absolutely perfect. Cold enough that you didn't break a sweat but warm enough that you're fingers didn't hurt. The snow provided excellent cramponing and I doubted that I would have good skiing conditions. Mount Ferguson is a very straightforward peak and I climbed to the col between the summit and Point 2420. Following the ridge to the summit, I hit a roadblock. A steep, chossy step blocked my path. In ski boots, I wasn't keen. I backtracked and down climbed very steep snow and gained the south face. I traversed over to the east ridge where I was denied again by a nasty cornice. Shit. I worked back across the south face and found a break between the summit and the step. Third time lucky, I dropped my pack and scrambled up to the summit. There is no denying the majesty of summiting a snow capped peak. In these moments one almost forgets to breathe, or rather, there is no breath. It has been taken away from you by the sheer magnitude of the surrounding landscape. Looking around, my eyes were directed to the remote and stunning Centaur Peaks - a mission for another day. My gaze wandered south along the crest of the Richardson Mountains to summits from previous excursions... Major Peak, Larkins, Black Peak... My ski descent from Mount Ferguson It was roughly ten in the morning and the snow wasn't going to thaw anytime soon so I decided to ski down and head over to Lapith Peak. A few steep and icy turns saw me off the upper mountain while lower down the gradient was relaxed. I crossed over to the second mountain of the day and transitioned below the south couloir. The terrain was somewhere around forty degrees and I used two tools to get up the face (mainly because I wanted to see how the Black Diamond Venom LT works as a pair - note: I love these tools). It felt good to be front pointing. I love the methodical rhythm of right tool, left tool, right crampon, left crampon, repeat. On the summit ridge the sun exploded above me. Blue sky stretched out in all directions. Only in the mountains can such an experience be encountered. The views were profound and I could not take my eyes off the Centaur Peaks. The east facing snow was perfect corn and I wished I was skiing that! Instead I was going to ski very hard, very steep snow. I took a ski strap and lashed my ice axe to my ski pole to create a whippet. Centaur Peaks from the summit of Lapith Peak Off the summit I did a few jump turns and traversed down into the gut. I crossed old avalanche debris and attempted to ski the slight southeast facing aspect of the couloir. It was still bulletproof until I hit corn at 1900 meters. Yes! I let off the breaks and opened up all the way back down to camp. Next to the creek, I took a moment to absorb the day before packing up. Two beautiful summits in perfect weather and stoked that I was able to ski them. A true blessing. The creek gurgled nearby and reminded me of the long walk that awaited. I ate, re-hydrated, organized my gear and shouldered my very heavy pack. My ski line off Lapith Peak It took the same amount of time to get out as it did to get in! Five hours on the trot under a scorching New Zealand sun. Back in the valley the wind rushed down the flanks of the mountains and I happily greeted it. I hadn't seen anyone the whole trip until I met two climbers on their way to "climb Earnslaw before the rain." Go get some. Eleven and a half hours later I got back to the car to end another spectacular trip. Happy days...
- McPherson Talbot Traverse
Date: Feb 1, 2025 Location: Darran Mountains, Fiordland National Park, Southland, New Zealand Total Trip Distance: 9.87 mi / 15.9 km Total Elevation Gain: 4,619 ft / 1,408 m Trip Duration: 13 hours 20 min Team: Flora Yu Field Notes: Start at Gertrude Valley or park higher up (if hitch hiking). Leave the road at the start of the tunnel and follow a trail and cairns north until a grassy area where a solid ground trail leads up to Homer Saddle. While sometimes exposed, Talbot's Ladder is easy scrambling on solid rock. Once above the Ladder, follow the South Ridge on the eastern side to the summit of McPherson. We found the easiest route onto the summit to be from gaining the South Ridge forty meters roughly below the summit. From here, follow the ridge over to Traverse Pass. Conditions will dictate the best route onto and off the pass. To get off the pass, we descended directly from Traverse Pass on terribly loose rock and made one short rappel to reach the snow. From here, pay attention for cairns at the 1620 contour which leads through the bluffs back to Gertrude Saddle. Grade: I, 2+ Garmin McPherson Talbot Traverse Route Topo Fiordland is a place where I do not spend enough time. Snow-capped peaks. Pristine rain forests. Rugged and raw. This is a place that deserves respect. The McPherson Talbot Traverse is one of New Zealand's classic alpine routes. It seems to be Fiordland's version of the Remarkables Grand Traverse. With another fantastic weather window lining up, I messaged my friend Flora to see if she was keen to join. Sure enough she was and we made the three and a half hour drive to Homer Hut. Mount Crosscut and Mount Christina from Homer Saddle It was a cold morning when we started. Not a cloud could be spotted in the sky and we were optimistic for a beautiful day in the alpine. We wore headlamps and organized gear while I brewed up some delicious coffee. We drove up towards the tunnel and got started. From the tunnel, a solid trail and cairns lead into the McPherson Cirque. Near a grassy area past a boulder field, a ground trail switchbacks up to Homer Saddle. We were treated to the early morning light filling the valley as we climbed higher. At the saddle, we had a quick bite to eat and rehydrated before beginning the climb of Talbot's Ladder. It was my first time climbing in the Darrans and I was stoked. Unlike the rest of the country, the rock in the Darran's is incredible. Most of New Zealand's mountains are composed of greywacke / schist - loose and flaky. The Darrans are unique in that the mountains are composed of granite - a climber's dream. The Ladder provided fun scrambling with excellent holds. It felt amazing to climb on rock that was solid, compact, and grippy. It was also cool to see Flora grow in her mountain climbing and push beyond what she had done prior. Above the Ladder, we followed the South Ridge of McPherson on the East side, putting on crampons two hundred meters below the summit. We continued our climb higher and the views were sensational. As fate would have it, clouds poured over the ridge twenty meters from the top. Most of the views were obscured. Flora climbing the snowfields on McPherson While the clouds came in, we searched for an easy route onto the summit. We found the best option to be from gaining the South Ridge forty meters roughly below the top. Once on the apogee , we high-fived and ate some lunch. This was my first summit in the Darrans. While we were grateful to be at the top, I felt slightly uneasy about the amount of cloud that was developing and was curious if the weather would deteriorate. My only concern was descending Traverse Pass in a whiteout as I had never been there before. Flora on the ridge between McPherson and Talbot We spent the next hour in and out of the cloud. The ridge between McPherson and Talbot is beautiful and when the clouds lifted, the views were stunning. We left the snow and scrambled up rock to gain the ridge slightly north of the pass. We scrambled along the ridge until we stood officially at Traverse Pass. As I expected, the cloud made it slightly more difficult to spot the best descent route off the pass. The rock was also terribly loose and extreme care needs to be taken here. With all of this said, I had expected this to be the crux of the trip and was prepared. Flora rappelling off Traverse Pass We searched for a way down and got within fifteen meters of the snow until we got cliffed out. From here I looked for a place to build an anchor and found a massive boulder - happy days. I looped some cordelette around the anchor, organized the rope, and called Flora down. Soon enough she was over the cliff and onto the snow and out of the way to safety. Then I followed, into empty space, and onto the snow. It felt like the major obstacles of the day were behind us. As we started down the snow, I was lazy with fitting my crampon and took a momentary slide. Although harmless in this scenario, other mountains would be less forgiving. Mountaineering is a practice that requires absolute focus. You could argue it requires perfection. I was actually disappointed in myself for such an amateur mistake but made sure to soak in the lesson post trip. I also think it's good to openly share with others who may read this. How easily does the mind switch off in the mountains when one thinks okay, we are safe now. You can see why most accidents occur on the descent. Back at Gertrude Saddle we finally gave ourselves a good break. I had expected to see more people there but it was just us. The weather was clear at this elevation and thankfully we were out of the clouds. A few hours later we got back to the van and rushed to Te Anau - arriving just in time for some delicious wood fired pizza. Happy days...
- Ben Nevis
Date: November 17 - 18, 2023 Location: Tapuae-o-Uenuku / Hector Mountains, Queenstown, Otago, New Zealand Total Trip Distance: 19.26 mi / 31 km Total Elevation Gain : 8,978 ft / 2,736 meters Trip Duration: 2 Days Team: Solo Field Notes: Permission must be sought before using the track on the Wakatipu side. Follow this track until it ends at a gate at roughly 1,000 meters. From here there are cairns to mark the way towards the creek. Be sure not to gain too much elevation here. Once in the creek, I oscillated between the ridges on the climber's right and the creek - there was no straightforward path. To summit Ben Nevis from the hut is roughly seven hours return with a lot of up and down and sidling. You're unlikely to see anyone on this trip. Bring wood as there was none at the hut! Rating: 1, I Download GPX File Google Maps Location Ben Nevis and Two Mile Hut Route Topo With perfect weather all week in Queenstown, I was a bit jaded when I woke up on my day off to find unrelenting pouring rain. The forecast said it was supposed to ease by late morning, but at noon it was still a downpour. Nonetheless, I figured I would walk into the hut in the rain and have a fire to get warm - neither would actually happen. As I drove south of the Remarkables, the weather was changing. There was a southerly wind blowing the weather out of the region and the sun started to poke out. I always love the lighting when there is a mix of storm clouds, blue sky, and sun. I arrived at the trailhead only to realize that the track to a hut isn't really a track. I'm pretty sure this goes on farmers land even though I've found multiple trip reports of Kiwi's using this exact track. It was too late and I had no alternative besides doing something else, which I wasn't going to do, so I went ahead and took the "risk." The first 800 meters or so follows a 4wd track of sorts up a gradual, grassy slope. The views over Lake Wakatipu are just stunning and I'd love to explore the area by Bayonet Peak, Bay Peak, Walter Peak, etc. I'd imagine not many make the effort to get back there. Beautiful golden tussock and blue skies Eventually the track ended at a gate and from here I loosely followed cairns that led to Two Mile Creek. As a note, the easiest travel is between the 1,300 meter and 1,350 meter contour lines. If you go too high, you will go up and down rather than a gradual increasing sidle. Once I sidled above Two Mile Creek, I dropped down to meet the water. There is no straightforward path here to the hut. I chose to stick to the creek for a bit until it narrowed and then climbed climbers right onto the grassy ridge until eventually dropping back down to the hut. Travel here was a bit frustrating as you can't see where to place your foot through the tussock and there were many holes that I stepped into. Navigating above Two Mile Creek Three and a half hours later I laid my eyes upon Two Mile Hut. It is truly in a spectacular setting as the craggy Hector Mountains rose above with a fresh coat of snow. As I walked into the hut it is quite obvious not many make the trip out here, there was a strong sense of solitude. My only regret was not collecting firewood on the way to the hut! Big mistake! This hut is definitely BYOW - bring your own wood. One thing that will not lose its luster is sitting in a backcountry hut, accompanied only by the wind blowing over the tops and the stream rushing nearby. I laid in complete silence, allowing my nervous system to tune itself to nature's orchestra. After a solid sleep of around six to seven hours, I opened the door to the hut and was greeted by crystal clear blue skies. I actually shouted "yes!" I made coffee, packed my bag, and set off for the summit of Ben Nevis. I thought it would be a quick jaunt to the peak, I was very wrong. There was so much sidling, ups and downs, and terrain changes that by the time I reached the summit and back I had gained close to 1,500 meters of elevation gain. From the hut I climbed to a saddle that looks into the North Branch of Wye Creek. From there, I sidled northeast until I reached a spot on the ridge at 1,950 meters. I was surprised to see how much snow was still out here and was glad I brought my light ice axe and crampons. Navigating snow slopes near Ben Nevis I dropped down a short snow slope and then climbed up another slope to reach a col at 2,000 meters on the west ridge of Ben Nevis. At this point I realized it was going to be a long day out. On the bright side, the scenery was spectacular and the weather perfect. There was a light wind that would blow about the mountains, creating an almost eerie silence. I kept moving as the sun was already very warm and I knew I would have to retrace my steps over those sun-baked snow slopes. At the col on the west ridge, I glissaded 200 meters down so that I could bypass steep, loose terrain. Again, I sidled to the west at the 1,800 meter contour level until I reached the rocky north face. From here it was straight up. The terrain was rocky boulders that had just been covered in a few centimeters of snow - lovely... My route from the col to reach the north face of Ben Nevis I continued my strong pace upwards, and at nearly four hours I reached the summit. I couldn't help but let out a celebratory yell. Ben Nevis was more challenging than I expected. It was also very much worth the effort. I sat in the sun, ate a sandwich made of venison salami , and enjoyed the views of the Hector Mountains. The silence was spectacular. Summiting Ben Nevis Knowing I still had the majority of the day ahead of me, I parted ways with the peak. I retraced my steps - back down the north face, sidled to the east, climbed two hundred meters up to the col, dropped back down, traversed snowy slopes, climbed up another snow slope, and did the long sidle over loose rock back to the col above Wye Creek. I dropped down to the hut, climbed up and above the hut, dropped down into the creek, sidled and climbed up out of the creek, and finally dropped another 1,200 meters all the way back to the car. Woof. Ten hours later, I was very happy to take a cold plunge in Lake Wakatipu and inhale some Indian food :) Happy days...
- Mount Aurora
Date: November 7, 2025 Location: Franz Joseph Glacier, Main Divide Range, Westland National Park, New Zealand Total Trip Distance: 2.52 mi / 4.05 km Total Elevation Gain : 1,313 ft / 400 m Trip Duration: 2 hr 6 min Team: Kevin Reid, Emilie Agnew, Louis Halpin, Ella Hartley, Patrick Hartley Field Notes: A fantastic ski from Centennial Hut. Straight up the North Face with a few steeper sections. Grade: II, 2 After a full rest day at Centennial Hut, where we waited out a 24-hour storm, we woke up to improved weather. Waiting out the weather at Centennial Hut The rain the previous day, combined with cold, clear overnight temperatures, had locked the snowpack up into a sheet of ice. It was going to be a while until we skied anything that resembled corn. So we waited. And waited...and waited... We got very antsy in the hut. People started acting like wild barnyard animals. Shit got weird for a minute Eventually, noon hit, we all became human again, the sun came out from behind the clouds, and we raced to put our gear on and head out the door. Our line off the summit of Mount Aurora Skinning towards the peak, Aurora is a small but beautiful mountain. The three-hundred-meter face is a perfect ski line. At the bottom of the face we transitioned to climbing gear and headed up. The only difficulty of the climb was navigating the two schrunds on the face. They were solid enough to cross, but later in the season could pose issues. Towards the top of the face, we met the second one and decided to detour and climb the Northwest ridge to the summit. The snow was quite warm already, so we transitioned quickly on the airy ridge and got ready to ski. Lewis summiting Mount Aurora One by one we made our way down the face, skiing a combination of corn and firm stuff. The last section over the schrund was the steepest bit, and care was taken over this last section. Once through this crux, we skied good snow down through the apron - stoked and smiling in the sun! Condition-wise, this was easily the best ski of the trip. Happy days...
- Minarets
Date: November 5, 2025 Location: Franz Joseph Glacier, Main Divide Range, Westland National Park, New Zealand Total Trip Distance: 6.5 mi / 10.4 km Total Elevation Gain : 3,555 ft / 1,084 m Trip Duration: 6 hrs Team: Kevin Reid, Emilie Agnew, Louis Halpin, Ella Hartley, Patrick Hartley Field Notes: For the West Face of Minarets, climb the snow slopes between De La Beche and Minarets. The slope gradually steepens to 40 degrees. Although we had great conditions, there can be large schrunds on this face throughout the year. Grade: III, 2+ The good graces of the weather continued, and after we attempted the northeast face of Mt. Humdinger, we skinned over in the afternoon to Centennial Hut for attempts on Minarets and Aurora Peak. We woke up to another beautiful day in the Southern Alps. God it was good to be out here. We left at sunrise, dropped down from the hut across the Chamberlain Snowfield, and made a quick approach to the west face of Minarets. Initially, we used ski crampons to ascend the initial section before reaching a flatter area where we switched to crampons and ice axes. The West Face is a sustained 40-degree climb up the face, and the team made quick work of it. Ella topping out on the West Face of Minarets We topped out on the ridge between De La Beche and the twin summits of Minarets. I watched two climbers whom I’d met in the hut, drop in to a 1,000-meter-plus ski descent of the Ranfurly Glacier. We continued higher and arrived at the first summit on Minarets, just 9 meters below the true summit. We hung out for a few minutes, took photos, soaked in the mind-bending views, and then walked over as a team to climb the higher summit. At the top, we lounged around taking photos, eating food, and enjoying the bliss of another 3,000-meter peak. It’s astonishing when you look around from these summits: in every direction, hundreds — no, thousands — of snow-capped peaks. In every direction, a classic route. And in every direction, an unclimbed line waiting for someone to take a shot at it. All while the ocean sits within reach to the west. Kevin summiting the high peak of Minarets Eventually, we decided to head down. We returned to the top of the west face between Minarets and De La Beche and got ready to drop in. Patrick, being the best skier in the group, went first. I watched him sidestep down the icy crux, make two jump turns, and then zip out of sight. I admired his ability to ski so proficiently in what I would soon discover were absolutely terrible conditions. I was next. I sidestepped down through the icy choke and called up to the others, “You might want to consider down climbing this.” I’m not sure anyone heard me — the wind likely swallowed my voice. Once past the crux, I stared down the face: a 40-degree icy slope ending in a massive crevasse at the bottom. A slip here wouldn’t be nice. I sideslipped the first section, preparing mentally for a jump turn. But I couldn’t commit. The slope was steep and I simply didn’t trust my edges in conditions this icy. Had it been corn or good snow, different story. But sometimes it’s better to put your ego aside, stay in control, and get down safely. So I did exactly that. I sideslipped the entire face, and I’m not ashamed to say it. The team at the bottom of the West Face of Minarets When I met Patrick at the bottom, we had a good laugh and waited for the others. The rest of the team followed, and long story short — there were some moments of real tension, but everyone got down safely. At the bottom, you could hear two distinct sounds - laughter and very deep sighs of relief. We skied the lower portion of the face, where the snow was “slightly” better, but the true treat of the day — besides the summit — was the few-hundred-meter descent down the Chamberlain Snowfield, in which corn was harvested. By now, the sun was blazing. So we regrouped, de-layered, and made the final hundred-meter climb back to Centennial Hut, where we relaxed and took (except Ella) a cold bath in the snow. Scorching sun on the Chamberlin Snowfield Another fantastic trip. Happy days...
- Mount Soho
Date: May 23, 2025 Location: Harris Mountains, Arrowtown, Otago, New Zealand Total Trip Distance: 16.7 mi / 26.9 km Total Elevation Gain : 5,875 ft / 1,791 m Trip Duration: 7 hours 45 min Team: Solo Field Notes: Bike, walk, or run up the 4WD track heading towards Macetown. At the junction with Soho Creek, head steeply uphill to the north, aiming for Point 1218. From here, continue north following the ridgeline along to Points 1608 and 1740, which eventually lead to the summit. Rating: Hiking / tramping Download GPX File Google Maps Location Mount Soho Route Topo It was a cold May morning as I peddled up the Arrow River. I always wondered what biking up the four-wheel drive track would be like. Within the first five minutes, I met my first river crossing. I tried to skip across some rocks to avoid soaking my footwear completely. This proved foolish as I slipped, smashed my knee on a rock, and dunked one of my gloves in the cold river. Classic. From then on, I just plowed through any river crossings and let go of my attachment to dry footwear. The track eventually stops zigzagging through the river and climbs two hundred meters along the windy road before dropping back down to my starting point for the climb at the junction with Soho Creek. I ditched my bike, dropped some layers, filled my water, and started up a steep tussock spur. It was ten thirty in the morning, and the low Autumn sun still hid behind the mountain. The air was still, and crickets chirped in the grass. My legs felt heavy and I focused on setting my all-day pace. Before I knew it I stood atop Point 1218 to greet the sun. What a perfect day to be up high. I followed the beautiful ridge up and around to Point 1608 and then on to Point 1740. From here, I finally spotted the summit of Mount Soho and walked the last ten minutes to the peak. The stunning ridgeline from Point 1218. Point 1608 is in the upper left of the image. Other than the occasional wisp of wind, the air was completely still and silent. Three hundred and sixty-degree views in all directions with Mount Aspiring to the north, the Remarkables to the south, the Richardson Mountains to the West, and the Harris Mountains to the east. It took me three casual hours to reach the summit from the river, and roughly two hours to get back down to the bike. Travel was straightforward and at times, a rough trail could be followed. The Arrow River from the slopes of Mount Soho. The 4WD can be spotted center image. I arrived back to my bike late in the afternoon with the sun making its final golden descent. Fortunately, the ride out was much more down than up, and I reached my van in about forty-five minutes. Happy days...
- Southern Criffel Range
Date: May 19, 2025 Location: Criffel Range, Cadrona, Otago, New Zealand Total Trip Distance: 14.2 mi / 22.8 km Total Elevation Gain : 3,353 ft / 1,022 m Trip Duration: 6 hours 10 min Team: Solo Field Notes: Start at the top of the Crown Range and follow the four-wheel drive track along the summits of Rock Peak to Queensberry Hill. The track drops down off the ridge and joins with the Meg Hut Pack Track. Take this back to the main road, where you either left a second car or plan on hitchhiking back to the top of the pass. Rating: Hiking / tramping Download GPX File Google Maps Location Southern Criffel Range Route Topo Since coming back from Dunedin in early May, I've been excited to get back into the hills to get the legs going. The only trip I had done so far was a casual overnighter to McIntosh Hut with Deanna. Looking at potential options on the map, I settled on traversing the Southern portion of the Criffel Range. I had done something similar last winter with Kevin and Emilie, traversing the Crown Range. The forecast was meant to be cold with a Westerly. I started early, around sunrise, and wasted no time heading up to Mount Hockern and Rock Peak. It was a gorgeous morning and the little bits of snow made me excited for winter. I spent the day following a four-wheel drive track, which made me wish I were actually on a gravel bike! The wind was consistent and cold and I had on all of my layers. Speargrass along the Criffel Range After summiting Queensberry Hill, the last "peak" of the day, I dropped down to meet the Meg Hut Pack Track and followed it to the road end. After twenty minutes of attempted hitchhiking, I was eventually picked up by a van-lifer who dropped me back to my own van at the top of the Crown Range. Looking southeast from the summit of Mount Allen This trip makes for a good training day where you don't want to push the body too hard. Happy days...
- McIntosh Hut
Date: May 5 - 6, 2025 Location: Richardson Mountains, Whakaari Conservation Area, Glenorchy, Otago, New Zealand Total Trip Distance: 12.72 mi / 20.5 km Total Elevation Gain : 4,600 ft / 1,402 m Trip Duration: 2 days Team: Deanna Luu Field Notes: Park at the Mount Judah Trailhead and take the track towards Heather Jock Hut. The track to McIntosh Hut branches off left and drops downhill crossing 2 streams. After crossing the final stream (The Buckler Burn), follow the poled route up to the saddle at Point 1244. Heading east, climb the final 200 meters to the hut. There are 4 mattresses and a water tank. Rating: Hiking Download GPX File Google Maps Location McIntosh Hut Route Map For April, I decided to get out of town and head to Dunedin for my annual Autumn surf pilgrimage. For me, surfing is the yin to the yang of mountains. Bold Peak and the Humboldt Mountains from the Buckler Burn Surfing is fun, flowy, less committing, and high vibes. The mountains are typically fun when it's over, feel harder on my body, more committing, and require long days. With surfing, a one-hour session can be life-changing. With the mountains, those incredible moments typically take a ton of planning, energy, and countless hours or days of physical work. I feel like I have more fun when I'm surfing, but I feel that the rewards and satisfaction are greater for mountaineering. The beauty is, I don't have to choose either/or. I choose both. And I choose depending on how I'm feeling or where my mental state is at. And at the end of April, I was ready to return to the hills. My friend Deanna decided to come visit for a week at the beginning of May, and one of her main goals was to stay in a mountain hut. I had a positive experience staying in McIntosh Hut when I climbed Black Peak back in the spring of 2023 and thought she would love it. With light overnight packs we made the steady climb along the Mount Judah track before heading left down to cross the Buckler Burn. The final nine-hundred-meter climb to the hut was a good test of fitness for Deanna, and she was stoked to finally reach our home for the night. The day was a screamer - barely a cloud in the sky. We laid out in the grass in our sleeping bags enjoying the views of Bold Peak, Mount Earnslaw, and the skyline of jagged peaks. Evening came and we sat inside by candlelight, trying to make up different card games until we passed out. McIntosh Hut at sunset. Morning was special to have coffee together, watching the sun illuminate the ocean of mountains. A strong northwesterly blew in and we decided to head down and treat ourselves to a coffee and pastry at Mrs. Woolly's. McIntosh Hut has a ton of character and remains a classic for the area. Happy days...
- Mount Liverpool, Governors Ridge
Date: February 27 - 29, 2024 Location: Snowdrift Range, West Matukituki, Mount Aspiring National Park, Otago, New Zealand Total Trip Distance (from Aspiring Hut): 21.09 miles / 33.94 km Total Elevation Gain (from Aspiring Hut) : 9,466 ft / 2,885 m Trip Duration: 3 days Team: Solo Field Notes: Mount Liverpool makes a fantastic climb over a long weekend. Bike into Aspiring Hut and climb the steep track to Cascade Saddle which offers plenty of scenic camp spots along with water and a toilet. From Cascade Saddle, Liverpool is climbed (along with Plunket and Islington Dome) by following the broad ridge. The crux of this trip are the crevasses along the ridge. From the camp at Cascade Saddle it took me 8 hours return. Rating: II, 1 Download GPX File Google Maps Location Originally this trip was planned to go with the OSONZAC club. However, a perfect weather forecast and a desire to climb on snow saw me biking solo up the West Matukituki. I've written about it before, but I simply love this place. It is almost as God himself designed this valley for mountaineers. There are still so many great peaks I've yet to climb...Rob Roy, Avalanche, Aspiring, Fog Peak, Tyndall, Popes Nose...this trip gave me this inspiration to potentially climb all the peaks of the West Matukituki. I'm not super keen on lists, so if it happens it happens by its own accord. I got way too late of a jump on the day and I left Aspiring Hut at six in the evening. Carrying three days of food, mountaineering equipment, and my bivy gear up a 1,450 meter climb was fun work. It took me exactly three hours to reach the saddle. Along the way, the views were incredible as normal. The sunset over Mount Aspiring was one of the best I've seen all season. I got into camp under headlight, quickly unpacked, ate dinner, and tried to get in as much sleep as possible. My original plan was to climb Tyndall on day two, but the more I thought about it I felt like I should go for Liverpool (and I'm glad I did). The weather forecast was calling for sun, clouds, and no precipitation. Being that there was virtually no risk of avalanches on the route, I slept in as much as possible. I was slow moving in the morning and was in a blanket of clouds all the way to a few hundred meters below Plunket Dome. When I broke the clouds and reached the snowline, I was surprised to see just how many crevasses were on the slope to Plunket Dome. I put on crampons, took out my ice axe, and moved cautiously up the slope. The feeling of sharp tools on hard snow is one of my favorites. The air was crisp, the sky blue, the views powerful. I quickly reached the summit of Plunket Dome and looked along Governor's Ridge to Liverpool. What I saw I couldn't believe - there were virtually no major crevasses to avoid! I was thrilled and kept moving. Once along the ridge the views of Mount Edward, Maoriri, Maruiwi, and Maori were stunning. From the Dart Glacier these are imposing climbs. Once above the last climb, I walked across a long snowfield before reaching the summit of Islington Dome. I scrambled up one of the pinnacles, unsure if I was actually on the highest one. To be honest, I didn't really care and am surprised this is even considered a summit. What lay before me was the final ridge to Liverpool and what a treat it was. A layer of cloud had swamped the the West Matukituki to the right while the Dart Glacier was clear on the left. The sun hit against the cloud and created an almost surreal scene. The summit ridge had a knife-like look to it, making the final steps an epic finish to the climb. I found a sheltered spot to have lunch and refuel. It was dead silent and I was alone in the alpine. Right before I left, the cloud cleared a bit and I was able to snap some summit shots. I retreated back to camp, took a seriously cold swim in the glacial fed stream, and crashed. The next morning I woke up to a brilliant sunrise and everything soaking wet with condensation. I hobbled out of my tent, fired up some coffee, and watched the sun hit the slopes of Tyndall and Ansted. I had the idea of climbing Tyndall but I lacked the motivation. By the time I reached the pylon, it was already way to hot. Down I go! Along the way I was able to chat with two young climbers who were stoked to have climbed Tyndall yesterday. It was cool to see them fired up on one of their first major climbs. We reached Aspiring Hut together and shared some snacks before I biked out and they walked. This was another classic New Zealand trip. Powerful scenes, a fun climb, solitude, great weather, and met some nice folks along the way. Happy days...
- Mount Earnslaw
Date: February 23, 2025 Location: Forbes Mountains, Mount Aspiring National Park, Glenorchy, Otago, New Zealand Total Trip Distance: 25 mi / 40 km Total Elevation Gain : 8,228 ft / 2,508 m Trip Duration: 14 hours 38 min Team: Alex Catalfamo Field Notes: The fastest and easiest way to get up the Rees Valley is via bicycle. At Kea Basin, continue following a trail north, to the obvious spur starting at 1,100 meters. Follow cairns and a ground trail up the spur to Point 1445. A heavily cairned route continues up the mountain, angling southwest at 1800 meters through rock slabs. Cross the Birley Glacier to the notoriously windy Wright Col. From Wright Col, head south up through scree and a gully until a steep ledges are encountered at 2600 meters. Follow a ledge system to the climbers left until 'The Keyhole' is encountered. This crux is more awkward than difficult and there is a fixed rope there if one trusts it. Above this, an easy walk leads out to the summit. We did this route in summer in perfect conditions and light crampons and a helmet were all that was needed. That being said, this route would change drastically in different conditions and is very prone to verglas. Rating: I, 1+ GPX File Route Map Mount Earnslaw East Peak Route Topo It was a chilly summer morning as we loaded the gear into my Nissan Caravan. Starry skies above made us optimistic for a beautiful weather day. We left the house somewhere around four thirty in the morning with the aim at starting at six. Fergburger was just closing, the staff were packing to go home, and we were going in. Alex walking up the Rees Valley Our landlord, Evan, was kind enough to lend us a spare bicycle and we pedaled up the Rees Valley towards Earnslaw. What a difference the bicycle makes on these long valley approaches. Halfway up the valley, Alex exclaims, “Wow - what a luxury this is!” And instantly my pedal falls off. You can’t make this stuff up. Unable to fix the bike we ditched them by the river and walked another forty minutes to the trailhead. Mentally, in the back of my mind, I was preparing myself for how hard the walkout was going to suck. Somewhere around seven, we were blasting our way up to Kea Basin. Light packs, minimal gear, and plenty of good food allowed us to travel light and fast - my favorite way to go. Above Kea Basin we were caught from behind by a Kiwi couple in their sixties, Mike and Julie. “You don’t need all that gear,” Mike exclaimed. What! All that gear! We were carrying 20-liter packs with our helmets on the inside. Then, “You guys want to tag along?” Our hearts said yes, but our bodies said no. Let’s make it clear - Alex and I were moving fast. It took us a little over five hours from the valley floor to the summit, but Mike and Julie were crushing. Even better, they were cool as. We enjoyed running into them a few times throughout the day. Their vibe was on another level. Just proves you don’t need to be a grumpy cunt as you get older. Alex crossing the Birley Glacier We climbed higher, trading tussock for rock slabs. The sun beamed to remind us of the heat it would bring later in the day. Travel was fast and easy as it seems like there is so much traffic in this area it has become a trail. We weren’t complaining by any means. At the glacier, we donned our ultra-light crampons, walked across the Birley Glacier, and arrived at the windy Wright Col. There were quite a few people out and about today. In fact, it was the busiest day I’ve seen on any mountain, ever, in New Zealand outside of the tramping trails. A father and son were wearing bicycle helmets and turned around at the keyhole as it was apparently dangerous. I guy wearing a rainbow tutu overheard him and said, “I just came down, it was sweet as.” We put our bets on the rainbow tutu guy that it would be “sweet as.” And indeed it was. The keyhole is more of a pain than it is difficult. It is an awkward squeeze through a narrow slot. Above the keyhole, we followed the heavily cairned route where we ran into Mike and Julie one last time. We spoke about fitness, age, and mountain goals. What stuck with me was Julie’s words, “We are just getting started.” We are just getting started. How deeply that hits home. Alex and I, best friends for the last 14 years, have said this phrase to each other every year. At thirty-three years old as I write this, I still feel it in my bones. I’m just getting started. Why not? We are all just getting started. However, it is easy to be convinced otherwise if one lives in their past or they are convinced happiness is someone else, somewhere else, or something else. To quote my mentor Garrett Gunderson, it’s about creating a life you never want to retire from. One of the best views I've seen in the Southern Alps. The summit of Mount Earnslaw. Alex and I arrived at the summit in the early afternoon, alone. The views were some of the most spectacular I’ve seen in a long time. The ocean of peaks that lead out to the deep blue ocean is not a common thing to witness. As we moved off the peak, the euphoria of the summit had washed away. It was going to be a grind. Back across the glacier, zig-zagging down through the slabs, and eventually back on tussock I had to hide in the shade. The sun was ruthless. Alex and I talked shit to each other to make each other laugh. We continued down, down, down. Right before the actual Kea Basin trail, I got us slightly off route and we battled with scrub. Alex was frustrated, mainly at me, and then took one of the best falls I’ve ever seen into a bush. The laughter was surreal. Left to right: Mount Head, Moira Peak, Mount Clarke from Kea Basin At last, we returned to the bikes feeling pretty tired. I sat down to rest but Alex motioned us to keep walking to the bikes. He was right. At the bikes, a miracle happened. Somehow I was able to jam my pedal into the bike and get it to pedal just enough to function. Every two turns I pushed the pedal back in with my foot. Life saver! Back at the van we threw our gear in and sped off back to Queenstown, just in time for a couple thousand calories of Indian. Happy days…
- Dingle Peak, Corner Peak
Date: May 14 - 15 , 2024 Location: Hāwea Conservation Park, Otago, New Zealand Total Trip Distance: 19.68 / 31.67 km Total Elevation Gain : 8,745 ft / 2,665 m Trip Duration: 2 Days Team: Solo Field Notes: This is a fantastic route over two peaks with a stay at a remote hut stocked with firewood. Travel up Lower Timaru River Track until one reaches Junction Hut. From here, take the obvious scrub free spur and join the ridge at 780 meters. Travel north along this ridge over Points 1073, 1317, and 1414 until eventually dropping roughly 400 meters to Moonlight and Roses Hut. From the hut, climb tussock slopes in a northwesterly direction until crossing over the ridge at 1600 meters. Climb to a saddle between Dingle Peak and Point 1739, then climb the easy northeasterly ridge. For Corner Peak, follow the entire west ridge down to the saddle between the two peaks and follow the simple tussock slopes up to the summit. Take the Corner Peak route back to the car. There is no water beyond the hut. Rating: Hiking / tramping, mainly off track GPX File Route Map Dingle and Corner Peak Route Map When I had climbed Ben Lomond the other week with my friend Liam under a spell of beautiful weather, I swore it would be the last trip for a month. I'm following my nose lately with surfing as this is prime season for it. The mountains, on the other hand, are going through a transition season. With all of this said, I saw a beautiful forecast line up in Wanaka and the town webcam showed me that the mountains around Hawea were still snow free. So I packed my bags... Corner Peak (left) and Dingle Peak (right). The traverse follows the skyline ridge. I was indecisive about whether I should take the Timaru High route or Lower route. I settled on the river route and guessed that I’d be able to dry my boots at the hut. Plus, it would save me significant elevation gain. I’ve never been fond of river travel and this didn’t change my mind. I feel like it’s difficult to get into a flow. It didn’t help that I tried to avoid getting my boots wet the first twenty minutes until I eventually caved and trudged through the crossings. This is easily the simplest way. Just go. I reached Junction Hut and decided it was time for a snack before I began my climbing for the day. Then, as if I was transported back to the times of Moses, sand flies descended upon me in ravenous fashion. It actually reminded me of being deep in the West Coast. I decided it actually wasn’t time for a snack and marched straight uphill. Once I gained the ridge towards Point 1414 I did indeed stop for a snack - a delicious sandwich with sourdough bread. It was deathly quiet. I hadn’t seen a soul. No cars in the parking lot either. The air was light, cold, and crisp. I marched onward towards Point 1414, sticking true to the ridge the entire time. There was a bit of light bush bashing to navigate, but by sticking directly on the ridge I was able to follow deer trails. I broke out of the trees and got a magnificent view of the ridge ahead and Dingle Peak. For a few hours I bobbed and weaved along the ridge, steadily gaining elevation. In the late afternoon a breeze picked up and layers were added to the body. Winter is on its way. By this point I had enough of climbing and decided to sidle east of Point 1414 and dropped quickly to Moonlight and Roses Hut. How happy I was to see it. There was no way anyone would be here. I opened the door and immediately came to the conclusion I was dead wrong. Gear was strewn everywhere and it looked as if all four bunks were taken. I sat down on a chair and thought about how miserable my night was going to be on the floor without a sleeping pad. I decided to get the fire roaring and eat before the hunters got back. As the sun set, darkness settled in and I wondered if the hunters would return. Around six-thirty, two headlamps approached the hut. I opened the door and met the father and son combo - Greg and Charlie. To my relief it was just the two of them, which meant I was able to have a bunk. Happy days! They apologized for the mess, which didn’t actually bother me. I was concerned about getting a mattress! They didn’t think anyone would be here and neither did I. Assumptions are the death of truth. One of the highlights of staying in huts are the people you meet. Greg and Charlie were two fantastic blokes. From the North Island raised in a rural environment. Charlie currently drives tractors and Greg a veterinarian. They have a deep respect for animals and you could tell how humble they both were. That night I slept like a barnyard animal. Morning wasn’t too cold but I stoked the fire anyways. Coffee went down the pipe along with some hot oatmeal. At seven-thirty I launched into the alpine. Up I went. Light slowly entered the atmosphere, perspiration gathered at the brow and stars receded. Within an hour I had climbed five hundred meters and sidled into the basin below Dingle Peak at 1,600 meters. From the southeasterly perspective, Dingle Peak looks formidable. I reached the saddle between Dingle and Point 1739 and began climbing the east ridge. Peaks of the Makarora Two hours since leaving the hut I stood atop the peak and the views were phenomenal. What caught my eye was Maungatika - a peak I imagine is rarely climbed. The views out toward the upper Makarora and the Aspiring Region were just insane. Sometimes I wish I still had my nice Sony camera… After a long break atop the summit I headed West towards Corner Peak. It took one hour to reach the saddle between the two mountains and from there maybe forty-five minutes to stand atop my second summit for the day. This summit is also spectacular. There was also a terrific view of Sentinel Peak as well. The summit of Corner Peak There wasn’t a breath of wind on the summit so I decided to get out the stove and brew a cup of coffee. There was a three hour descent coming my way and wanted to add as much fuel to the tank as possible. I slugged the coffee and began my march back to the car park. Day two turned out to be an eight and a half hour day. This trip actually surprised me with how physically challenging it was. For example, you climb significantly more elevation doing this trip than the towering Brewster out in the distance. New Zealand doesn’t really have any “easy” mountains to climb after all. Happy days…
- Mount Tyndall
Date: March 20, 2025 Location: Harris Mountains, West Matukituki, Mount Aspiring National Park, Otago, New Zealand Total Trip Distance: Bike - 11.48 mi / 18.47 km | Climb - 12.34 mi / 19.9 km Total Elevation Gain : Bike - 1,037 ft / 316 m | Climb - 7,155 ft / 2,181 m Trip Duration: 10 hours 55 min Team: Alex Catalfamo Field Notes: The North East ridge of Tyndall is accessed by climbing the Cascade Saddle route from Aspiring Hut. At the top of the climb, head South towards along the easy ridge towards the summit. Sidle below Point 2380 and aim directly for the North East ridge. Scramble loose rock to the summit. There are excellent campsites with reliable water sources along the ridge. Rating: II, 1 GPX File Route Map Mount Tyndall Route Topo We are approaching the end of the season now. Colder morning temperatures, leaves beginning to change colors, and broken glaciers are a signal of the outgoing tide. It has been one hell of a season and I'm so grateful for all of the amazing trips that have happened throughout spring, summer, and autumn. With so many peaks climbed, it's funny the list grows bigger of new summits to explore. The last time I was up the West Matukituki was in January climbing Bevan and Joffre. As I biked out of the valley on that trip I thought it would be my last trip up the Matuki this season. However, as Alex and I brainstormed ideas I thought it would be a good idea to take him up Tyndall. Henry and I had gotten skunked on this peak last season because of a pour route choice and we ran out of time. Naturally, I wanted to repent and clear myself of all sins and find enlightenment atop the nearly 2,500-meter-tall peak. Alex climbing towards Cascade Saddle So there we were, biking up the valley hoping we wouldn't have another mechanical issue like on Earnslaw. As we were nearing Aspiring Hut, I hit a rock and my left hand slipped off the handlebar and my right hand squeezed the front brake. Bad combo. I go directly over the front of my bike. In mid-air, I remembered a time when I was 13 when I went over the handlebars, landed on my shoulder, and broke my collarbone. So I decided not to let my shoulder take the impact. Instead, I just sprawled out and ate dirt. My bike flipped into the bush. Other than my knee getting a pretty good thrashing I was okay. This was the closest call I've had all season. I'll take it. It's always the moment when you mentally switch off. At Aspiring Hut we stopped for breakfast and watched four Keas absolutely maul our bikes. I had a foreboding of bad things to come at the end of our day. As if it was going to make a difference, we threw a bunch of sticks on our bikes. Mount Tyndall from Cascade Saddle Light packs and full hearts we started up the Cascade Saddle track. I don't care how fit you are, this track is freaking steep. Long story short, we got to the top in two hours and twenty minutes and enjoyed a break. There was no wind and no clouds. The sun was oppressively hot and I felt like we were in Afghanistan. We took the ridge heading South and got our first view of Tyndall. Snow melt from the glacier above provided pure drinking water and we gladly rehydrated. At the toe of the glacier I laughed at myself for the route Henry and I took last time. This thing was a mess! I will say, however, that a fresh covering of snow from a few days prior made it look like a snowfield. Either way, I took us directly under Point 2380 and we walked at the edge of the Isobel Glacier. We started up the North East Ridge, climbing about twenty meters below the actual ridge line. Just below the summit, we climbed up a ramp, joined the ridge, and made the final moves to the summit. I looked down at my watch: four hours and thirty minutes from Aspiring Hut. We fist bumped - stoked on the feeling of fluid movement in the mountains. The summit view from Tyndall is actually incredible. The Harris Mountains, Richardson's, the Main Divide, Fiordland, Aspiring, and even Cook was visible in the distance. What a place to be. After our summit break, we scampered back down the ridge to Cascade Saddle and eventually back to Aspiring Hut. We wondered about the state of our bikes. Other than my seat being completely mauled, it seemed we were good. I got on my bike. Alex got on his bike. Alex started to pedal. Then his chain got completely jammed. Jammed so badly that Alex considered walking out. We spent fifteen minutes trying to un-jam the chain while getting savagely attacked by sandflies. At a breaking point, Alex walks into the hut and asks for help. A girl tells him, my boyfriend is good with bikes. I'll get him. Meanwhile I'm trying to undo the chain. Then this couple walks out and the guy goes, oh wow, your chain is jammed. Hmm, I don't know how to get it out. I didn't bring any tools. I'm realizing in the moment that this guy doesn't have the heart to help. He was probably sitting inside next to a fire writing poetry and drinking herbal tea. Meanwhile, I'm on the front lines battling sandflies while Alex is, quote, "ready to carry the bike out the West Matukituki." It felt like Black Hawk Down. It was do or die. Then I look at the bike guy and say, do you want to try and undo it? His response was (and no I am not kidding), oh no, sorry, I don't have any soap to wash my hands. I don't have any soap to wash my hands! I don't have any soap to wash my hands! This is the state of men in the world today! Herbal tea and hand soap. Then Alex comes up and grabs the bike like he's trying to strangle it and rips the chain free. His biceps flex in the evening light. I tilt my head back and howl like a wolf. We are free. The couple runs back inside to their books and tea while we fly out the West Matukituki - blood pumping and brains steaming. Happy days...
- Mount Tyndall Attempt
Date: April 20, 2024 Location: Harris Mountains, West Matukituki, Mount Aspiring National Park, Otago, New Zealand Total Trip Distance: Bike - 11.48 mi / 18.47 km | Climb - 12.37 mi / 19.9 km Total Elevation Gain : Bike - 1,037 ft / 316 m | Climb - 6,977 ft / 2,126 m Trip Duration: 10 hours 35 minutes Team: Henry Frakes Field Notes: The North East ridge of Tyndall is accessed by climbing the Cascade Saddle route from Aspiring Hut. There is water at 940 meters on the climb. From the Pylon, travel the easy ridge heading south towards the peak. Sidle below Point 2380 and aim directly for the North East ridge. Scramble loose rock to the summit. There are excellent campsites with reliable water sources along the ridge. Rating: II, 1 Download GPX File Google Maps Location Mount Tyndall Route Topo Authors Note: below is my personal account of a light and fast attempt on Tyndall. Although a long day, the climb is straightforward and we simply chose the wrong route across the glacier and ran out of time. A successful ascent of Tyndall can be viewed here. It took until the end of the season to finally go on a mission with someone other than myself. I originally met Henry when I went to get a phone plan back in late spring. Oddly enough, I wanted a phone plan so I could make connections with other climbers and he was the person working there that day. Some things are too serendipitous. So we found ourselves meeting at the Raspberry Flat trailhead the night prior. Our plan was to start at 7 am and go light and fast - ticking off the summit in one day. I drove the gravel road to the trailhead, cooked dinner, packed, and went to bed. I woke up in the middle of the night to loud music and a car spinning out in the parking lot. Five minutes later the truck returned and out popped a local Kiwi farmer-looking guy, likely in his early twenties. It was two in the morning. He began knocking on cars, waking people up, and asking them where "Aspiring Hut was." After seeing him wake up the third group of people, I walked up to him and asked what he was doing. After a minute or two standoff in which I think he was surprised that a guy bigger than him with his shirt off was confronting him, he got back in the truck. They never returned. It was odd to have this experience out here, but I suppose anything can happen when alcohol is involved. A few cups of coffee later, Henry and I set off at quarter after seven. The morning was very cold, very crisp, and very beautiful. Because I've vowed never to walk the approach up the West Matukituki ever again, I biked. Henry, without a bike, ran. Somehow we arrived at Aspiring Hut at the same time. The bike was stashed, we drank some water and began our climb. The route to the pylon at the top of Cascade Saddle climbs 1,370 meters in a very short distance. I think we were both feeling excellent this morning because we reached the top in two hours twenty. I could tell already that Henry was very fit. We refueled and kept our face towards Tyndall. Mount Tyndall is one of those peaks that never seems to get any closer. Then, as if we were propelled forward by some imaginary force, it felt right in front of us. We were about 250 meters from the summit. All we had to do was cross a short glacier, climb the ridge, and reach the summit. As we were walking across the glacier, suddenly, Henry broke through a crevasse up to his knee. Whoa. We both stopped and expressed our surprise. I think we were both totally locked into "crushing it" mode that we never stopped to evaluate that we were on a glacier that we've never been on without crevasse rescue gear. Not even five minutes later the snow gave away under my left foot and I broke through a crevasse, scraping my leg on the icy lip, blooding my leg. Now we were awake. I quickly bandaged my leg and we retraced our steps back to solid rock and decided to talk things over. The issue was not that there was a glacier or that the climb was dangerous. Tyndall, by mountaineering standards, is on the easy end of the spectrum. A scramble at best. The glacier is traversed typically without glacier gear. The issue was that there had been recent snowfall over the last week and it had covered the crevasses, making it extremely difficult to tell where they were. We chose the wrong route across the glacier and should've climbed the rock rib to our left. For perspective, I had climbed Mount Liverpool a month and a half ago . On that trip, the first peak one ascends is Plunket Dome. and it was very crevassed. Today, it looked like a snow field. If one had never seen it before, you wouldn't think crevasses were ever there. Henry retreating back to Cascade Saddle. Barff, Aspiring, and Rob Roy on the horizon. Then we heard the sound of a helicopter. In some sort of joke, the helicopter flew over the ridge and landed directly on the glacier. A group of tourists jumped out of the helicopter, walked around the glacier, jumped back in, and left. We couldn't believe it. In hindsight it was very obvious... we simply chose the wrong route. We should have stayed high, avoided the glacier, and scrambled up the North East Ridge to the summit. Thankfully we laughed it off and decided to pack it in for the day. We made quick work of the descent and headed back towards our vehicles. Even though we didn't reach the summit on this particular trip, it was still a fantastic day out. It was epic to finally have a partner to go on a mission with. Henry is a guy that I can grow in the mountains with. Happy days...
- Major Peak
Date: January 30, 2024 Location: Richardson Mountains, Glenorchy, Otago, New Zealand Total Trip Distance: 9.73 mi / 15.6 km Total Elevation Gain : 5,873 ft / 1,790 m Trip Duration: 7 hours Team: Solo Field Notes: A fun scramble with fantastic access directly off the Glenorchy Queenstown road. Park at Lake Creek Creek Falls trailhead and follow the orange poled route directly up the ridge. Continue up the ridge beyond the fence line. Sidle into the Basin at roughly 1,620 meters. Climb the diagonal ledge across the face that leads to a moderate rock scramble to reach the summit. Seasonal conditions will dictate how challenging the upper face will be. Rating: I, 1 Download GPX File Google Maps Location Major Peak Route Topo The last two weeks in Queenstown have been wet, cold, and windy. I was pleased to see a good spell of weather line up and decided on climbing Major Peak off the Queenstown Glenorchy road. The access for this climb is great. I parked at Lake Face Creek trailhead and headed directly up the spur on the true right of the creek. To my surprise there was a solid trail and poled route that led up the ridgeline. There was virtually no scrub and travel was fast. With a super light pack I made fast time and enjoyed the feeling of being light on my feet. I started very early in the morning and the stillness and soft light of early morning is always a gift. After climbing non-stop for 1,000 meters I decided I'd take a quick break and eat my first meal of the day. The views across Lake Whakatipu to the Humboldt, Ailsa, and Thomson mountain ranges was amazing. It's mind blowing just how many mountains there are in New Zealand. I kept moving and at 1,620 meters sidled into the Basin, five hundred meters below the summit. From here the route seemed obvious. I would take the diagonal leading ledge across the face and scramble to the top. I popped on my helmet and began to work up the face. Major Peak Summit Route The climb was never that steep until the final thirty meters or so were I encountered moderately steep but easy rock. I arrived on the summit exactly three and a half hours since leaving the car. The views from the summit were spectacular. I particularly enjoyed the view north towards Wire Saddle, Stone Peak, and Mount Larkins. I relaxed on the summit for about thirty minutes, eventually tearing myself away. Care had to be taken off the summit as there was a bit of loose rock. Larger parties may want a helmet as I did kick off a rock or two. It was relatively quick work back down to the car and I finished the day with a lovely cold soak in Lake Face Creek. Happy days... Minor Peak, Lake Whakatipu, and the Thomson Mountains
- Mount Larkins, Mount Alaska
Date: February 21-22, 2024 Location: Richardson Mountains, Whakaari Conservation Area, Glenorchy, Otago, New Zealand Total Trip Distance: 19.07 mi / 30.69 km Total Elevation Gain : 7,481 ft / 2,280 m Trip Duration: 2 days Team: Manuel Freudenmann Field Notes: Larkins is likely best climbed with a base camp from either Heather Jock Hut or Kelly's Hut . The route over Mount Alaska is stunning yet could prove difficult in navigating avalanche terrain in winter. Snow often lingers on Larkins until late summer. Rating: I, 1 Download GPX File Google Maps Location Mount Alaska, Larkins Route Topo Map I found myself climbing yet another peak in the Richardson Mountains. A short drive from Queenstown with easy access and low numbers of travelers has me question why this area is not more popular. Whakaari Conservation Area I pulled into the trailhead quite late, packed my things, and headed up to stay at Heather Jock Hut. By the time I left my van it was past 7pm. The walk in was a gentle grade and I enjoyed watching the sun make its final dip below the Humboldt Mountains. The joy of this trip came in meeting Manuel Fredenmann. A well traveled, open-minded, and artistic traveler. He also had intentions to climb Larkins which would make this his highest peak ever climbed. We had a stimulating conversation in the hut and make intentions to be up early to climb Larkins together. Manuel shook me awake at 5:45 and I had coffee brewing in no time. By 6:15 we were out of the hut and making our way up Mount Alaska. The sun made its ritual climb from the east and the colors that greeted us were spectacular. Being that Manuel is a professional photographer and that I do love photography myself, we couldn't help but capture these fleeting moments. Manuel on the summit of Mount Alaska The summit of Alaska was arguably the highlight of the day with stunning colors in all directions. Manuel and I were completely stoked. The mountains provide magic moments and this was one of them. Tearing ourselves away we continued on to Larkins. The terrain felt slow moving as we climbed up and down along the ridge, sidling difficulties as they came. Eventually we reached Kelly's Hut which meant we only had 450 meters of climbing left. We grinded up scree, took a left at the summit plateau, and stood atop the 2,300 meter peak four hours since leaving the hut. Manuel summiting Larkins The wind decided it would blow a rather stiff breeze so we ducked behind the summit for shelter and enjoyed a meal in the sun. At this point we decided it would be good if we knew each others names! From Larkins I could see both Black Peak and Major Peak, two excellent trips. After resting for thirty minutes and taking a few final photographs, we headed back down to the hut. We decided to find an alternate route back to the hut and were able to find an old mining route on the east side of Mount Alaska. Back at the hut I said goodbye to Manuel and took a snooze in the hut. In the late afternoon I strolled back down to the car for a burger in Glenorchy. Happy days... Heather Jock Hut
- Mount Bevan, Mount Joffre
Date: January 16-18, 2025 Location: Main Divide, Bonar Glacier, Mount Aspiring National Park, Otago, New Zealand Total Trip Distance: Bike - 11.48 mi / 18.47 km | Climb - 21.57 mi / 34.71 km Total Elevation Gain: Bike - 1,037 ft / 316 m | Climb - 7,731 ft / 2,356 m Trip Duration: 3 days Team: Solo Field Notes: To reach Bevan Col, take the Upper West Matukituki Valley Track to Scotts Rock Biv. Although the track is "unmaintained," the route is cut with the occasional pole. At 1,000 meters the track climbs above a waterfall and into a gut. Head to the climbers right (northeast) up a series of slabs until a flat area is reached at 1300 meters with great camping spots. From here, initially head north to avoid steep terrain, then swinging back around to the east/southeast to gain easy rock and snow slopes the lead directly up to the Col. Bevan is climbed directly from the Col which I found to be surprisingly steep with terrible rock quality. Joffre is best climbed by sidling around the rocky ledges at the Col and getting onto the edge of the Bonar. If you sidle too high you will get bluffed out. Walk along the Bonar to the base of Joffre where an easy ramp can be found at the southern end of the peak. Take the ramp and walk to the summit. The Bevan Col slabs would be dangerous in bad weather. Rating: Bevan - II, 1+ | Joffre - II, 1 Download GPX File Google Maps Location It's been a spring and summer to remember. Since the torrential weather in September, there have been countless fine spells that have allowed for many grand days of skiing, mountaineering, and tramping. Unsurprisingly, I found myself gearing up for another trip up the West Matukituki. The original intention was a light and fast attempt on the North West Ridge of Aspiring, but Henry's ankle wasn't cooperating so I had to shift gears. Cascade Saddle, Plunket Dome, and Governor's Ridge from the West Matukituki I figured a great idea was to head up to Bevan Col and climb a few lesser-visited peaks in the region. This would allow me to scout the route and get more in tune with a part of the Matukituki I've yet to explore. I wanted two nights out in the hills, so on day one I started late and ended late. Camp was set up in the dark. I found a nice little spot next to the river on a sandy patch. To no surprise, sandflies woke me up in the early hours. I quickly packed and headed up the valley towards the infamous Bevan Col slabs. At the head of the valley, I skirted around the waterfall on a ground trail. A large cairn indicated the start of the slabs and I followed a trail to the top. At 1,300 meters I arrived at a clearing with wonderful camp spots. I was unsure if I had actually climbed the slabs because there was a distinct ground trail the whole way up. I dropped my overnight gear here, buried it under rocks to avoid the Kea's, and continued up to the Col. The climbing was fast. A good cairn system marks the whole way and I never had to put on crampons. I was using my ultralight system on this trip: ultralight axe, 10-point flexible crampons, and light hiking footwear. Anything else would be completely unnecessary. At the top of the Col, I stopped at an idyllic tarn and admired the stunning South West Ridge of Mount Aspiring. It beckons to be climbed next season. To my left stood Bevan and I wandered up the slopes. It's a short climb from the Col but it looked very steep. The rock was of atrocious quality with plenty of choss. I kept saying out loud "fucking hell this is steep for a Grade 1." I climbed the direct East Ridge from the Col, wondering if for some reason I was off route. There were two distinct steps on the climb where a fall would be extremely consequential. The rappel tat confirmed this. The views from the summit were spectacular. Mount Aspiring, the mountains of the Bonar, the remote Waipara Range, Barff, and the lower Matukituki. It was stunning. I didn't hang out for long and wanted to continue my journey towards Joffre. I wondered if that would also be harder than indicated. I made a few very delicate moves off Bevan, found a patch of continuous snow, and boot-skied down to the Col. From here, I sidled around the ridge leading to Joffre and got onto the edge of the Bonar. Soft snow and flat terrain made it unnecessary to don crampons. Joffre looked very intimidating from the glacier and doubts stirred. I got up directly under the face in the scorching sun and looked for a way up. At the Southern end of the mountain I saw a ramp that lead to the South East Ridge. I couldn't see the whole route and felt like it was my only real option, so I took it. Ten minutes later I stood at the summit. I don't think I even used my hands. This was a walk and Bevan was a scramble. Powerful scenes from the summit of Mount Joffre Again, the views were profound. My favorite was looking out towards Barff, the Waipara Range, and the Olivines. I enjoyed some food, water, and a moment off my feet. The weather was spectacular and I soaked in as much of the moment as possible. Easily off the peak, I ran back towards Bevan Col, charged up from two glorious summits. It was light work on the descent and I got back to camp, only to find the stones removed and my sleeping bag shredded from some extremely curious Kea's. Fortunately, only a bit of down was removed and it was easily fixed with gear tape. I spent the rest of the afternoon doing cold plunges in the nearby stream and getting cooked like a rotisserie chicken from the heat underneath my tarp tent. As soon as the light faded I fell into a sporadic but good enough sleep. Morning was calm. I was in no rush to leave and enjoyed the views as I consumed breakfast and too much coffee. As the caffeine hit, I rushed down the Bevan Col slabs too far to the climber's right and had a moment of "Oh, this would be terrible in bad weather." Easily enough, I course-corrected but made a mental note for next time. I merrily tramped my way back to my bike at Aspiring Hut and enjoyed a brief conversation with two other mountaineers heading in the opposite direction. I only took one rest from the campsite back to my bike as the sun was ruthlessly hot and I wondered if I was genuinely melting. Thankfully, a breeze blew down valley and pushed me back to my van in forty-five minutes which capped an end to a fantastic three days in the hills. Happy days...
- Stone Peak
Date: December 7, 2024 Location: Richardson Mountains, Glenorchy, Otago, New Zealand Total Trip Distance: 10.12 mi / 16.28 km Total Elevation Gain: 6,257 ft / 1,907 m Trip Duration: 9 hours 34 min Team: Solo Field Notes: I had spotted this potential route from the Glenorchy Queenstown road for the last year and wondered if it would provide access to the summit. This is an excellent, direct, and scrub free route. It is best climbed in early season when snow fills the South West couloir, otherwise it becomes dangerously broken with loose rock and may be unclimbable. The top pitch of the couloir steepens up just a bit, which indicates the '+' in difficulty. At the top of the couloir, sidle around to the North West and climb extremely loose rock to the summit. If climbing in a party of two or more a helmet would be a wise choice. There are excellent camp spots at 1,450 meters. Rating: I, 1+ Download GPX File Google Maps Location Stone Peak Route Topo For the last year I've been driving past Stone Peak along the Glenorchy Queenstown road eyeing the snow filled couloir that tops out just shy of the summit. I knew the couloir was obviously climbable, but was unsure of the final climb to the summit. My original plan was to climb Stair Peak in the Rees Valley, but the Rees Valley Station had informed me that they were doing some work in that area. I drove back down the road, saw the Stone Peak route was still in, and made my decision. The Humboldt Mountains at sunrise The alarm woke me up at three thirty in the morning. These pre-dawn starts never get any easier and I hate the feeling of being sleep deprived. At four I was off and the stars flickered above. I headed north down the road until I spotted the 4wd track which would take me across the pasture. From here I began the steep climb towards Point 1234. Summer is an amazing time in the Southern Alps and I couldn't believe how much light filled the sky this early in the morning. The temperature was perfect and I hardly broke a sweat. I sidled Point 1234 on the West and got my first view of the couloir. Wow , steeper than I thought. Today's climb was going to be a bit different. I was trying out my new ultra-light crampons that fit on hiking boots and trail runners - the Petzl Leopard. I also had my ultralight ice axe - the Black Diamond Venom LT. There is much to be said about the ultra light mentality. Simply put - some people (like myself) find enjoyment in moving light and fast in the mountains. Other people like the comfort or style of the traditional approach. Other's prefer a blend. One's approach to a mountain is based off of experience, skill set, goals and mentality. Think for yourself, consciously evaluate your goals and skills, attempt the mountain, and then evaluate. There is ultimately no right or wrong. Personally, I will not go back to a heavier ice axe. My Black Diamond Venom LT is an amazing, light weight tool that does everything I need it to. When it gets steeper, I will pair it with a second tool - The Black Diamond Venom LT Tech. If the terrain gets into the fifty degree range (2+ climbs or above) than I will use my Petzl Quarks. With crampons, if the climb is lower angle snow than I will use my Petzl Leopard's. If it gets slightly steeper than I will pair them with my mountaineering boots for more stability when front pointing. When the terrain gets into the forty degree range or above, than I will use my Black Diamond Sabretooth 12 point crampons. You may think to yourself - wow...that's a lot of gear to own. Yeah, I also get out a lot. I also like to choose the best tool for the job to increase speed and safety which means I have more fun. For Stone Peak, the steeper section would push the Petzl Leopard's to my limit when paired with a flexible hiking boot and I wanted to see how it would work. When I got onto the steeper section of the couloir, I could immediately feel the difference in security. My mountaineering boots have a stiff sole which provides a solid platform. My hiking boots felt like I had crampons attached to a sandal. Well, I guess I found my limit of these crampons on hiking boots! A look at the upper part of the couloir where it steepened up. Challenging in soft boots! I wound up having to kick steps all the way up the couloir. The snow was firm and my toes were in agony. This process was painfully slow but I could not afford to get lazy. Near the top, I angled off to the climbers right to try and get off the snow. I looked for a way to climb the South West facing terrain to the summit, but it was steep and broken. At a few points I considered turning around. I stayed focused and made my way to the top of the couloir. What would be a simple climb with mountaineering boots turned into an exhilarating climb! I sidled to the North West aspect of the mountain and climbed unbelievably loose rock to the summit. Quite a few times I dislodged a massive piles of rocks that crashed below me which echoed around the mountains. Finally, I stood atop the summit. The Southern aspects of Mount Larkins were still covered in snow which glistened in the early morning light. Turning around I viewed the rarely climbed Major Peak. Across the lake I was amazed to see how much snow was still on Bold Peak and the Humboldt Mountains. As always, the views were incredible and I was grateful to be there. I had a quick bite to eat and decided to get back down the couloir while the snow was still in good condition. I found the down climb to be slightly less arduous only due to the fact that I could follow in the steps I had previously kicked. It was great to be off the snow and I allowed myself my first real break in the day - six hours in. The retreat back to the car never really gets any easier even though I get fitter by the trip. The legs still tire, the toes hurt, the sun relentless. Fortunately, what never gets old is a cold plunge in the stunning Lake Whakatipu post trip. After my dip, I parked my van in the shade and dozed off for a much needed afternoon nap. This was a great trip...stoked on Stone! Happy days...
- Stair Peak
Date: December 27, 2024 Location: Richardson Mountains, Rees Valley Station, Glenorchy, Otago, New Zealand Total Trip Distance: 9.78 mi / 15.74 km Total Elevation Gain: 6,012 ft / 1,832 m Trip Duration: 7 hours 8 min Team: Solo Field Notes: Start at the Invincible Mine Heli Pad and take the 4WD track uphill. At 760 meters, the track ends in a clearing. Turn to the north and look for a clearly defined sheep trail that heads through a tight scrub belt. The trail emerges from the scrub at 820 meters. Cross a small creek to the north and continue heading uphill towards McDougalls Spur. Enter the creek at 1,360 meters staying mainly on the true right. At 1,560 meters an obvious spur leads directly up to the basin below the summit where great camping can be found. Aim for the col between Stair Peak and Point 2149. Take the North Ridge to the summit. Make sure to get permission from Rees Valley Station: 03 442 9908 Rating: I, 1 Download GPX File Google Maps Location Stair Peak Route Topo One of my favorite things about being in the mountains is developing an intimate relationship with a specific set of peaks. By spending time in one mountain range, you get to know the rock, animals, and climate that make it unique. You begin to figure out the optimal time to climb and ski. One learns the access routes, camping locations, and secret bivy's. And of course, you get to know the people. When I called the Rees Valley Station for permission to access the land near Invincible Mine, Iris (one of the landowners) was happy to hear my voice. Mike! It's great to hear from you again... A huge smile spread across my face. It was going to be another great trip. The Humboldt Mountains from the Rees Valley I woke at five-thirty in the morning to low cloud in the valley. Birds sang out and you could tell it was going to be a miracle of a day. I quickly made breakfast, a coffee, and set out. I took the 4WD track that starts on the true left of McDougalls Creek at the Invincible Mine Heli Pad. I hopped the gate and appreciated the gentle incline as a warm-up. At 760 meters, the track ends in a clearing. To the north, a clearly defined sheep trail leads up through tight scrub before emerging at a small creek. I crossed the creek and went uphill in an easterly direction. Like I've written so many times before, the morning was spectacular. Cloud hung in the valley while the Humboldt and Forbes Mountains towered above. Earnslaw is the eye-catcher, but I was drawn more to the remote summits of Mount Head and Moira Peak at the back of the Rees Valley. I continued uphill through open tussock country, appreciating the scrub-free travel. I was making excellent time and I felt light on my feet. Soon enough I was entering the creek south of McDougalls Spur with Stair Peak looming above. On the approach, I sidled forty meters above the creek. On the descent, I followed the creek. The latter is significantly easier. Prince of Wales Flat, The Flood Burn, and Mount Aurum from Stair Peak At 1,560 meters an obvious spur leads directly up into the basin below Stair Peak. I took this and continued to make fast travel. My ice axe and crampons were totally unnecessary today, but being so lightweight, I wasn't fussed. I climbed directly to the col between Point 2149 and Stair Peak. Three hours and thirty minutes after leaving the car I stood on the football field sized summit. The views were not as dramatic as other summits along the Richardson's, such as Lapith Peak or Stone Peak, but I did appreciate the view into the Flood Burn and Mount Aurum. I took my summit photos, had a bite to eat, re-hydrated and went on my way. Travel was fast off the peak as I boot-skied down the scree. Stopping only for a quick drink in the fresh stream, I skipped my way back along the creek. Surprisingly, the descent took roughly the same amount of time as the ascent. As always I was happy to be back at my van for some fresh fruit and my ritual recovery protein shake to cap off a perfect summer day. Happy days...
- Emily Peak
Date: March 10, 2025 Location: Ailsa Mountains, Mount Aspiring National Park, Glenorchy, Otago, New Zealand Total Trip Distance: 16.05 mi / 25.8 km Total Elevation Gain : 6,093 ft / 1,857 m Trip Duration: 11 hours 54 min Team: Alex Catalfamo Field Notes: Take the Routeburn Track towards Flats. At the junction with the hut, take the trail up towards Falls Hut. At the third bridge, walk underneath the bridge and head into the stream bed. The stream immediately splits, take the branch to the climbers right. The stream bed offers easy travel, although would best be avoided after heavy rainfall and is probably best climbed in summer or autumn. At 1,200 meters, leave the stream and climb through tussock angling towards Emily Pass. Head into the gut, taking care with loose rock, angling up and around to Emily Pass. To access the South West Face, drop down at least 100 meters and sidle around the mountain. At the base of the face, easy slabs lead up to the summit. Difficulties are easily surpassed by finding a ledge or alternative. Rating: I, 1+ Download GPX File Google Maps Location Emily Peak Route Topo Alex and I have been on a tear since he arrived in New Zealand. Week after week of good weather has seen us up many of the local peaks. Incredibly, Alex stepped on a bee just a few days before the trip and his foot swelled up like a balloon. We had plans to go do Cleft Peak over two days but thought it was better to have another rest day. We woke up on Monday morning and hit the road early. The temperature was cool and we almost put gloves on. The trail was quiet. Just a few hikers were making their way back to their cars to finish the Great Walk. Alex climbing out of Emily Creek. Somnus and Momus behind. At the Falls Hut junction, we started uphill and got to our bridge in fifteen minutes. At least I thought it was the right bridge. Turns out it was the third bridge we were after. I realized this just a bit too late. Instead of simply backtracking, I took us on a fifteen-minute scrub bash. Alex wasn't happy. Sorry mate! Back in the correct creek branch, we made fast travel up through the stream bed. At 1,200 meters we climbed out of the creek, onto a spur, and followed a cairned route East in a basin. In hindsight, this isn't necessary. A more direct route would be to climb out of the creek at 1,200 meters and head directly South for Emily Pass. To access the pass, we headed into the obvious gut which heads up and wraps around to the Southwest. We found it to be wet with loose rock and care should be taken. Finally, at the top of the pass, we dropped down about one hundred meters and wrapped around the peak to access the South West Face. Alex's ankle was bothering him at this point and I was slightly concerned on how he'd go on the steeper face. We took our time looking for the best route up the mountain and picked our way up the face. Determined, Alex powered on. Alex on the South West Face of Emily Peak. Ocean Peak in the background. As we climbed higher, the views became dramatic. Lush green valleys split by a blue flowing river. Spiky mountain top peaks against a cobalt sky. At six hours since leaving the car we stood on the summit. Somnus, The God of Sleep, stood high above the North Routeburn. Although the mountains in this region are not as high as the other peaks in the region, the views are out of this world. After a good lunch, we started down and made light work of the descent. I kept thinking of how this face would ski with snow on it. The summit of Emily Peak. Mount Somnus is the snow capped Peak. We sidled over annoying terrain at the bottom of the face and made the climb back up to Emily Pass. The rest of the day was as expected: a long grind down through Emily Pass, back across slippery tussock, down a creek, and eventually a few hours along the Routeburn Track. Alex's ankle was fully pissed off and after almost twelve hours we were both stoked to be off our feet. Another classic memory with 'Talf! Happy days...
- Cleughearn Peak
Date: February 16-17, 2025 Location: Lake Monowai, Fiordland National Park, Southland, New Zealand Total Trip Distance: 25.61 mi / 41.2 km Total Elevation Gain : 7,968 ft / 2,429 m Trip Duration: 2 days Team: Alex Catalfamo Field Notes: Take the Green Lake trail until the col near Point 974. Head southwest through the trees until breaking out of bushline at 1,000 meters. Battle through scrub up the northeast aspect of Mount Cuthbert. From here, route finding is straightforward - follow the main ridge from Point 1430, over Rocky Top to Cleughearn Peak. There are many tarns perfect for camping. From Cleughearn Peak, head west towards Point 1453, eventually following the ridge all the way to Point 1315. At this final high point, travel east until an obvious orange marker indicates a trail that leads down to Rodger Inlet Hut. Follow the trail back to the car. Rating: Tramping, off trail Download GPX File Google Maps Location Cleughearn Peak Route Topo Since Alex's arrival back in New Zealand, we have enjoyed some brilliant trips. Temple Peak and Mount Earnslaw were epic day trips in the Aspiring Region. Since most of my trips are focused in this area, Alex pitched the idea of heading out to Fiordland. I had been eyeing this loop of Cleughearn Peak for over a year and the weather was cooperating, so we pulled the trigger and drove South. We arrived at Lake Monowai on a beautiful summer day. The wind was blowing a gale in Otago but it was peaceful down here. Alex finding a way through the bush Our trip started by taking the notoriously muddy Green Lake trail. Thankfully, at least for trampers, it has been a dry summer and the trail was in great condition. It took us a few hours to reach the col near Point 974 where we would leave the trail. I searched for the best option through the trees, which was fine until we broke out of the bush line. Funny enough, I thought the bush was behind us. Unfortunately (mainly for Alex as it was his first time experiencing New Zealand scrub bashing), it was pretty shit. For the next hour we bashed through waist high scrub, fighting our way to the summit of Mount Cuthbert. While Alex verbally assaulted the scrub, I spoke words of encouragement to him. "I promise it will get better bro." I had no idea what I was talking about. I had never been here before and had no idea what lay ahead. Fortunately, it got better. The Golden Hour in Southern Fiordland The views from the summit of Mount Cuthbert were unreal. A vast sea of remote and wild mountains lay before us just begging to be explored. We dropped down off the summit and traveled past Point 1169. Our original intention was to camp at the big tarn below Point 1430, but we decided to change our plans. It made more sense to climb along the ridge, summit Rocky Top, and then drop a few meters to the small tarn below Cleughearn Peak. We arrived at camp late, headlamps beaming. After a sound sleep we woke to a spectacular sunrise with views of the ocean. Alex led us to the summit of Cleughearn Peak where we enjoyed breakfast. In the early hours of the day, you could already feel the strength of the sun so we continued on. We spent the day rambling over the tops, stopping every twenty minutes to snap photographs. The views were insane. The type of views you only get in Fiordland. Rugged peaks exploding out of the earth, dense forests, small lakes and tarns everywhere. There was a faint breeze in the air and not a soul in sight. How I would have loved to spend just another night out camped next to one of the many incredible alpine pools. At our last high point (1315), we grabbed a bite to eat and refueled, preparing ourselves for the trek out. Alex swapped his shirt for a fresh one and we dropped into the bush. The trail down to Rodger Inlet Hut was amazing - I couldn't believe it! It was nice to be out of the sun and surrounded by forest. We arrived at the hut eight hours into the day. I took a cold plunge in the stream while Alex escaped the sun and chilled in the hut. After a solid break, it was time to commit to the walk out. Now, for anyone reading this, I want to be very honest about what you can expect from the Rodger Inlet Track. It is an absolute mother fucker of a trail. Muddy, boggy, hard to follow, constant up and down, rough, scrubby, etc. Everything you don't want from a trail, this one has. Alex mesmerized by the raw beauty of Fiordland. Point 1260 behind. From the small tarn back below Cleughearn Peak to the car took us ten hours and forty-five minutes, moving quickly. We would say this trip was as physically challenging as Earnslaw, which we did in a day. We were also carrying super light packs as you can see in the photos. It ultimately boils down to terrain. We were worked when we arrived back at the car. I would say this is one of the hardest trips I've done in a long time! Being in remote Southern Fiordland on a Monday night, there were no places to eat. So we drove back towards Queenstown until eventually eating a Kebab at a very, very strange place in Lumsden. I won't go into details. This trip was a Fiordland classic and I hope the photos do this one justice. Happy days...
- Mount Avalanche
Date: January 4 - 5, 2025 Location: Main Divide, Bonar Glacier, Mount Aspiring National Park, Otago, New Zealand Total Trip Distance: Bike - 11.48 mi / 18.47 km | Climb - 18.69 mi / 30.07 km Total Elevation Gain: Bike - 1,037 ft / 316 m | Climb - 9, 631 ft / 2,936 m Trip Duration: 2 days Team: Solo Field Notes: From French Ridge Hut, climb French Ridge to gain Quarterdeck Pass. Drop down to the Bonar Glacier, head east, and climb the Flight Deck to avoid gendarmes on the lower part of the ridge. Climb to 2,400 meters where the West Ridge is gained. Climb steeper terrain until a flat area is reached. The final climb is a 140 meter slab of grade 10 rock. There are plenty of solid cracks which allow for straightforward climbing. A rope could be useful for the descent. Rating: II, 10, 2 Download GPX File Google Maps Location Mount Avalanche West Ridge Route Topo My van rattled loudly as I drove up the West Matuktuki - again. How many times would I make the drive this season? I can't deny that climbing all of the mountains in this zone have turned into a goal of mine. From the first time I ever came into the West Matukituki I knew this place was beyond special and I've wanted to deepen my relationship with it ever since. I can't think of anything more intimate than reaching all of its distinct high points. Shovel Flat, West Matukituki Mount Avalanche is one of the mountains I've wanted to climb the most. From the road coming into Raspberry Flat, the East Peak and the Avalanche Glacier dominate the scene. From French Ridge, the West Ridge looks extremely imposing. It is a stunning mountain. I knew the Quarterdeck was still in good shape and I had an excellent weather forecast, so I loaded up my gear and made the drive. The road was rutted out so badly that my radio stopped working. My van is a loud van and when it shakes I subconsciously harbor the fear that it will just explode (even though it is in excellent mechanical condition). Soon enough I was done rattling in the van and began rattling on my bike up to Aspiring Hut. Huffing and puffing I made it there in an hour. The weather was beautiful. A few wisps of cloud, a breeze blew down the valley, and sandflies bit at exposed skin. I continued on foot, crossed the swing bridge at Pearl Flat, and began the climb up to French Ridge Hut. The first six hundred meters of the track are quite steep and I listened to Talking Heads to keep up the stoke. At 1,100 meters it levels out and I was grateful to just simply walk instead of scramble. The hut was fully booked and I considered setting up my tarp. However, some extremely friendly tourists invited me inside and had no problem with me sleeping on the floor. From L to R: Mount Barff, Mount Bevan, Bevan Col, Mount Joffre from French Ridge In the outdoor community in New Zealand, which is a lovely community, it is quite common to hear a lot of negative comments directed towards tourists. Most of these often complain that they overcrowd huts, campsites, walking tracks, etc. Some of these comments can be quite cynical. I could write more on the hypocrisy of this subject another time, but the point I'll make for now is this: overwhelmingly, the kindest people I meet in the mountains are tourists. At French Ridge, the interest the "tourists" took in my trip intentions, the climb, the gear, my life story, etc. made me miss life on the road. Travelers are naturally curious people. And to some degree, we are all tourists. At four-thirty, my alarm went off. At five-fifteen, I woke up again and realized I had slept through my alarm. At five-thirty, I was out the door. The Quarterdeck at sunrise The Quarterdeck was in excellent condition. However, the wind was seriously strong and one gust actually blew me over. In my head, I already made the decision that I was not going to climb the exposed slabs on the West Ridge in these conditions. Because it was so early I decided to continue on to the base of the climb in hopes that the wind would abate. Up and over the Quarterdeck, I descended the Bonar and headed east to climb the Flight Deck. I was happy with my decision to bring my ultralight 10 point crampons as anything more would be overkill for the low-angle snow terrain. About three hours since leaving the hut I was under the slabs on the West Ridge. Slabs on the West Ridge of Mount Avalanche The wind was still howling. Clouds moved rapidly above my head. Fortunately, the wind was coming from the east, and the summit acted as a shield. Climb on! Although the one-hundred-and-fifty-meter slab looked daunting, I found the climbing to be simple. There were huge cracks on the face that provided solid holds. I moved silently up the face, focusing on every detail. Towards the top, the rock quality deteriorated but the climbing became easier. Mount Avalanche Middle and East Peak from the summit of the High Peak Finally, I stood alone atop the peak. The wind blew, clouds swirled, the sun beamed. I felt how lucky I was. My thoughts turned to my Grandmother. It was her funeral today and I knew my dad was grieving. I recorded a video for him and shed a few tears in the process. The mountains bring out every emotion. Although I brought my sixty-meter RAD line, I never used it. I found down-climbing the slabs to be very straightforward. There is a lot of rappel tat on that mountain and I wouldn't trust any of it. I was happy to be back on solid ground on the Flight Deck and merrily made my back up to the Quarterdeck and down to French Ridge. My legs were cooked by the time I reached the valley floor. It was stinking hot and I dreamed of my ritual cold plunge post-trip. Plus I knew I had a cold sparkling coconut water in my fridge at the van! Motivated by the end of temporary suffering, I hoofed it out of the valley, only to return again soon... Happy Days...
- Homestead Peak Attempt
Authors Note: click here for a successful attempt of Homestead Peak. Date: November 23, 2024 Location: West Wanaka Mountains, West Matukituki, Mount Aspiring National Park, Otago, New Zealand Total Trip Distance: 12 mi / 19.31 km Total Elevation Gain: 4,769 ft / 1,453 m Trip Duration: 7 hours 48 min Team: Solo Field Notes: Start at Raspberry Flat and follow the track all the way to the final lookout. Head north following the 820 meter contour until heading uphill in a northwesterly direction, aiming for the small tarn on the map (which has disappeared) at 1,220 meters. From here climb steeply to 1600 meters, sidling steep terrain, until in the basin below the summit. Easy snow slopes lead to a straightforward but exposed scramble along the North Ridge. Rating: I, 1+ Download GPX File Google Maps Location Homestead Peak Attempt Route Topo I can’t believe I found myself driving up the West Matukituki again. It’s been the third trip here in the last 5 weeks. However, this time felt different. I didn’t feel recovered from Craigroyston a few days ago. The last five weeks has seen a lot of hard trips. Specifically, one week ago I put in five thousand meters of climbing, the most I’ve ever done in a week. The following seven days my body has felt exhausted. Since a big injury seven years ago I’ve developed a deeper relationship with my body and am tuned it to what it needs. We are conditioned to look externally for internal answers. The government, doctors, “science,” God, our parents, our smart watch, teachers, mentors…the list goes on. Everything I mentioned above is a valuable tool and has its place. But Ultimately, there is no wisdom like the wisdom of the body. The wisdom of the body that has been developed for hundreds of millions of years. Nature has an undeniable rhythm that has been working effectively - forever. And to tune into your body and develop an intimate relationship with is powerful. Today I broke that practice. I went to bed the night before knowing that I shouldn’t go up the mountain. I should take it easy. But no, the mind has other plans. Typically plans that go against the wisdom of the body. Rob Roy Glacier Bridge So at six fifteen in the morning I was off. I crossed the bridge over the Matukituki and headed towards Rob Roy Glacier. It was my first time here and the view was stunning. As I left the track and followed Rob Roy Stream, a MASSIVE piece of the glacier broke loose above me. When I say massive, it was fucking huge. In that instant I thought, holy shit…what if this runs to the valley? I started wind sprinting uphill. Thankfully, there is a massive shelf at Point 1176 that catches all the debris from the glacier and I laughed out loud. I continued to move slow and at 1200 meters reached a level area completely filled with size 3 avalanche debris. Whoa. At four hours in I put crampons on. I couldn’t believe how hot it was already. The freezing level was forecasted at 2,000 meters rising to 2,400 meters in the morning. As I climbed higher, the route began to sidle steeper north facing terrain under Point 1917 at roughly 1600 meters. The snow was already very wet and my foot punched through twice. I took off my cap and wiped a big layer of sweat off my forehead while I looked around. There was avalanche debris everywhere on every aspect. I dug down 50cm in the snowpack to discover that snow was already soaked. The freeze had broken down rapidly. I still had four hundred meters to the summit and this slope would only get more intense solar radiation as the sun moved from East to West. There’s a good rule I picked up from Cody Townsend: go until it doesn’t make sense anymore. It didn’t make sense anymore. I also wasn’t having fun either, so I bailed. I don’t think the chances of getting in an avalanche this day was absurdly high, but in that moment I genuinely didn’t want to be on that mountain. My body sent me a strong message before the climb that I ignored. I wasn’t going to do it again. I felt it was getting risky, for no reason, and emotionally and physically I wasn’t there. So why the fuck would you go on? If you never listen to your intuition you will never know the truth about yourself. You will spend your entire life looking out. The East Ridge of Rob Roy Low Peak Turning around in the mountains is a skill, not an error. Paul Newman said it best, “sometimes having nothing is a pretty cool hand.” Human beings would be the only animal on the planet that would judge or shame themselves (or another) when walking away from a potentially dangerous situation. The mountains for me is a sacred place. A place of worship and a place of freedom. It’s where I go to get in touch with reality and what is true. For it to remain that way for me, I need to go when I feel inspired and stay home when unmotivated. Climb higher when there is alignment between body, soul, and mountain and go home when there is division. Enjoy your life and as always, happy days…
- Single Cone, North East Ridge
Date: December 31, 2024 Location: The Remarkables, Queenstown, Otago, New Zealand Total Trip Distance: 4.88 mi / 7.85 km Total Elevation Gain: 2,395 ft / 730 m Trip Duration: 3 hours 36 min Team: Solo Field Notes: A straightforward route with easy access from Wye Saddle. The upper sections offer fun scrambling on good rock. The South East gully provides an easy descent with bolted anchors for rappelling Rating: II, 2 Download GPX File Google Maps Location Single Cone North East Ridge Route Topo The North East Ridge of Single Cone from Wye Saddle I woke up to beautiful weather in Queenstown and wanted to get into the hills. The Remarkables offer quick and easy access to alpine terrain and I had always wanted to do the scramble up the North East Ridge of Single Cone. I finished work early, loaded up my climbing gear, and drove the long and windy road to Remarkables ski field. While the weather in town was sunny and warm, at 1800 meters it was cool, windy, and cloudy. I threw an extra layer into my bag and set off. Summer access to Wye Saddle is super fast. I followed the established trail and within an hour I was at the base of the North East Ridge. The upper sections looked pretty steep and I was curious at their difficulty. The guidebook says, " the upper rock steps are steeper than they look." If I were to rewrite the description, I might write, "The upper rock steps are easier than they look." I found the scrambling moderate, with great holds on solid rock. It was super refreshing to go on a climb where choss and scree were not constantly being dislodged from the mountain. At the summit, clouds circled in, obstructing my view. Fortunately, Henry and I had stood on this summit before when we had done a winter climb of the Grand Traverse in clear weather. I didn't stay on top for long and headed over to the South East gully for my descent. I inspected the rappel station, fixed my Petzl Rad Line to it, and rappelled down. With just two rappels I was back on solid ground and was able to quickly make my way back to the car. Only three and a half hours round trip car to car while not rushing in the slightest. This is an excellent half-day out on fun rock! Happy days...
- Sharks Tooth Peak
Date: January 21, 2024 Location: Harris Mountains, West Matukituki, Otago, New Zealand Total Trip Distance: 8.9 mi / 14.3 km Total Elevation Gain : 5,619 ft / 1,712 m Trip Duration: 6 hours 30 min Team: Solo Field Notes: This is a fantastic climb straight out of the parking lot with stunning views from the summit. The approach follows the central spur leading directly to the col between Sharks Tooth and Craigroyston. The summit is gained by climbing the south west ridge. The final thirty meters has quite a bit of exposure and is no fall terrain. I would bring a rope in winter / early spring. Rating: I, 2 Download GPX File Google Maps Location Sharks Tooth Peak Route Topo Back in 2014 my friend Sam and I attempted to climb Sharks Tooth Peak. We had very little mountain experience at the time and it felt like a big undertaking. To be fair, there has been a big increase in climbing beta over the last ten years in the Southern Alps, increasing the odds of a successful ascent. That day, we chose the wrong ridge in the dark and found ourselves in some very steep terrain. We pretty much just gave up because we were scared. I still don't know how we successfully climb Mount Barff that season. A grade 2 miracle! Those days were filled with adventure. On this day, it was one of the most straightforward ascents of my life. I drove into Gods land - the West Matukituki. Funny enough, at the final stream crossing I ran into my friend Lisa and gave her a ride to the trailhead. We caught up for a bit while I packed my things, covered my face in zinc, and eventually set off to climb the peak. Sharks Tooth is simply stunning from the parking lot. I crossed over farm land and took the obvious spur leading up to the col between Sharks Tooth and Craigroyston. Travel was fast and easy with a light pack and a light wind to keep the heat at bay. As a climbed higher I ran into an obvious trail that took me straight up the mountain. I ran into two climbers heading down the peak but didn't stop to chat for long as I was in total flow. The views were simply incredible and Rob Roy, which I am convinced is a God, dominated the scene. This is my favorite mountain in the West Matukituki and I am very keen to climb the West Face in spring. Rob Roy Peak Once at the col the wind jacked up and I threw on my Patagonia Houdini. I continued to follow the solid climbers trail to the base of Sharks Tooth. It looked quite steep! I ditched my poles and threw on my helmet, working my way up the obvious ridge on the climbers right. The climbing was low angle at first until the final fifty meters or so. From here, the climbing was easy but with tons of exposure. A fall would be disastrous. About twenty meters from the top, I decided to sidle around to the southerly side of the mountain where I found a very exposed ledge system that would lead me to the summit. The exposure had my heart in my mouth but again, the climbing was straightforward. I crossed the ledge and found easy rock that took me to the top of the peak. Happy days. Powerful scenes - Rob Roy Peak above Raspberry Flat The views from the summit were incredible. Better yet, three Kea's swooped in and shared the summit with me - the first Kea I had seen since I returned to New Zealand in October. I took a long thirty minute break and soaked in the West Matukituki and everything it had to offer. In front of my eyes lay Rob Roy, Fog Peak, Craigroyston, Liverpool, Barff, Dragonfly, and even the peaks of the Upper Volta Glacier. Magic land. As with every summit one eventually does have to tear themselves away. Care was taken off the peak and soon enough I was collecting my poles at the base of the climb and the helmet came off. A few hours later I was back at the car where an Indian curry awaited me in Wanaka - but not before the ritual cold plunge. Happy days...
- Craigroyston Peak
Date: November 17, 2024 Location: Harris Mountains, West Matukituki, Otago, New Zealand Total Trip Distance: 7.16 mi / 11.52 km Total Elevation Gain: 6,209 ft / 1,892 m Trip Duration: 9 hours Team: Rob Fraser Field Notes: This is a relentlessly steep mountain. Start as Raspberry Flat car park, hop the fence and walk across a brief section of farm land. Head directly up through bluffs, aiming to join the North West Ridge at 1,200 meters. Follow the ridge, sidling obstacles as they arise. An alternate option would be climbing the terrain just off the ridge to the West. Continue following the ridge higher up until a few hundred meters below the top. It is not necessary to cross the nasty gut. Pick any convenient line that joins the West Ridge to the summit. This peak would best be climbed in early season with snow. Rating: I, 1+ Download GPX File Google Maps Location Craigroyston Peak, North West Ridge Route Topo The route through the bluffs to gain the North West Ridge of Craigroyston Rob and I arrived at the parking lot the day prior to scout out conditions. We had originally intended to ski Craigroyston, but as we drove up the West Matukituki it seemed unlikely. I can't believe how quickly the snow was melting. We made a quick dinner and headed up the valley to get a better view of the upper mountain conditions. We were definitely not skiing. With neither of us packing mountaineering boots Rob came up with the brilliant idea of chucking our ski boots in our backpacks and using them once we hit snow. Problem solved. We packed it in early and set our alarms for just after five. The North West Ridge of Craigroyston Peak Besides a sheep yelling outside of the van, we slept peacefully. The morning was cold and we were off at six. We appreciated how direct the route was, however, the terrain was brutally steep. My legs didn't feel fully recovered from my trip earlier in the week in the Richardson Mountains and it was going to be a long day. Two hours in and we gained the ridge at 1,200 meters. From here we followed the North West ridge steeply up, sidling obstacles as they arose. The views were sensational as always and it felt great to have a super fit partner with a great attitude on this trip. We climbed higher and got our first view of the summit at 1,900 meters. There was plenty of snow now and we were stoked to take out the sharp stuff. Crampons on and ice axes out we traversed slightly below the ridgeline and worked our way to the obvious snow ramp that lead up to the summit ridge. The climbing was easy and straightforward. Snow conditions were excellent. Rob is a fit dude with a background in mountain / ultra running. I'd like to think I'm also pretty mountain fit as well. Today, we were huffing and puffing like cigarette smokers! Finally, about five hours in we reached the top. Happy days. The views were as expected - incredible. It was cool to look along the true right of the valley and look at the other peaks I've been fortunate to summit - Fog Peak, Sharks Tooth, Liverpool, Barff. The next phase is to climb the major summits on the true left! Rob following the West Ridge to the summit of Craigroyston Peak We allowed ourselves ten minutes on the top before our descent. The snow was warming and it wasn't necessary to stay for long. We shot a few pictures and videos and began the descent. I'll save the details, but it was a leg burner and our quads were screaming by the time we reached the van. Thankfully, I packed a few cold juices and we headed straight to the West Matukituki for a cold plunge. Happy days... Rob heading down after a successful summit of Craigroyston Peak